
When Can You Transplant Hostas?
Welcome to the world of hostas, where verdant leaves and delicate blooms unite to create stunning garden landscapes. These versatile and resilient perennials have captured the hearts of garden enthusiasts worldwide, gracing countless yards with their beauty. As any seasoned gardener knows, transplanting plays a crucial role in the life of hostas, allowing them to thrive and expand their lush dominion.
Whether you’re a novice gardener looking to add these charming plants to your outdoor oasis or a seasoned pro seeking to divide and conquer, understanding the optimal time for transplantation is essential. In this article, we embark on a journey through the seasons, uncovering the secrets to successful hosta transplantation.
From mastering the art of timing to unearthing the best practices for soil preparation, we will delve into the nuances of transplanting hostas to ensure your green darlings continue flourishing and enchanting for years. So, grab your gardening gloves and trowels as we explore the fascinating world of when and how to transplant hostas for ultimate garden success.
Hosta Transplant Timing: Seizing the Perfect Season
Transplanting hostas at the right time of year is crucial to ensure their successful establishment and continued growth. The perfect season for hosta transplantation largely depends on the climate and the specific variety of hosta you are working with. Let’s explore the ideal timing for hosta transplanting in different regions and climates:
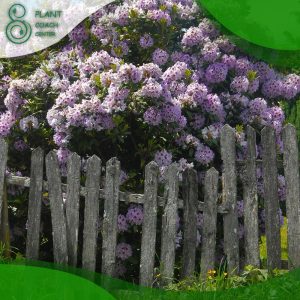
Spring Splendor
For many regions with moderate climates, spring is the prime season for hosta transplantation. As the frost recedes and the Ground begins to thaw, it’s the perfect time to get your gardening gloves on. Transplanting hostas early in the spring allows them to take advantage of the entire growing season ahead, establishing their root systems and acclimatizing to their new environment.
Cool and Coastal
In more relaxed and coastal areas with milder summer heat, late spring to early summer offers a suitable transplanting window. The warm soil temperature provides hostas the best conditions to comfortably settle into their new home.
Summer Strategy
In hotter regions, transplanting hostas during the scorching summer months is not recommended. However, if you need to move a hosta during this time, opt for early morning or late evening when the temperatures are more relaxed, and the sun’s intensity is reduced.
Fall Fantasy
Fall can be an excellent alternative for transplanting hostas, particularly in regions with hot summers. As the temperatures cool and the growing season slows, hostas can adapt well to their new location without extreme heat stress.
Weather Watch: Selecting the Ideal Day for Hosta Transplantation
Selecting the perfect day for hosta transplantation is essential to ensure these beloved plants’ smooth and successful transfer to their new home. Weather conditions can significantly impact the survival and establishment of transplanted hostas, so it’s crucial to be mindful of the forecast before embarking on this horticultural journey. Here are some key weather factors to watch for when planning your hosta transplant:
Temperature Considerations
Hostas are hardy plants, but extreme temperatures can stress them during the transplant process. It’s best to choose a day with moderate temperatures, ideally between 60°F to 70°F (15°C to 20°C). This range provides a comfortable environment for the plant to adjust to its new surroundings without facing temperature-related shock.
Cloud Cover and Sun Exposure
Opt for a day with partial or complete cloud cover when transplanting hostas. Cloudy conditions reduce the risk of wilting and water loss during the process. If the only available day is sunny, try transplanting early or late in the evening to avoid the intense midday sun.

Rainfall Timing
Keep an eye on recent rainfall patterns before transplanting hostas. It’s best to transplant when the soil is moist but not waterlogged. This ensures the hostas have access to sufficient water without drowning their roots.
Wind Speed
Wind can quickly dehydrate hosta leaves and disturb the transplant process. Choose a day with light to moderate wind speeds to minimize the risk of damage and stress to the plants.
Avoid Frost and Freezing Conditions
If you transplant hostas in the spring or fall, avoid days when frost or freezing temperatures are forecasted. Hostas are sensitive to freezing conditions and can suffer damage or die back if exposed to frost.
Extended Dry Spells
Avoid transplanting hostas during extended dry periods. If the weather forecast predicts a prolonged dry spell, consider postponing the transplant until more favorable conditions arrive.
Digging Deeper: Preparing the Soil for a Successful Hosta Transplant
Preparing the soil is a crucial step in ensuring a successful hosta transplant. Hostas are known for their adaptability, but providing them with a nutrient-rich and well-prepared soil environment will significantly aid their establishment and growth. Here are essential tips for digging deeper into soil preparation for a triumphant hosta transplant:
Soil Assessment
Before transplanting, assess the soil in the current location and the new planting site. Hostas prefer well-draining soil with a slightly acidic to neutral pH (around 6.0 to 7.5). Test the soil pH using a home testing kit or send a sample to a local extension service. Consider amending the soil accordingly if the pH is outside the desired range.
Loosening the Soil
Hostas thrive in loose, well-aerated soil that allows their roots to spread quickly. Use a garden fork or tiller to loosen the dirt in the new planting area to a depth of about 12 to 18 inches (30 to 45 centimeters). This aerates the soil and improves its structure, making it easier for the hosta roots to penetrate and establish.
Amending the Soil
Incorporate organic matter into the soil to enhance its fertility and texture. Compost, well-rotted manure, or peat moss can be mixed with the native soil to provide essential nutrients and improve water retention. Aim for a soil composition that is loose, crumbly, and rich in organic content.
Removing Weeds and Debris
Clear the new planting area of any weeds, rocks, or debris that could hinder the hosta’s growth. Weeds compete for nutrients and water, so eliminating them will give the hostas a better chance to thrive.
Adding Mulch
Consider adding a layer of organic Mulch around the newly transplanted hostas. Mulch helps retain soil moisture, suppresses weed growth, and maintains a consistent soil temperature. Apply a 2 to 3-inch (5 to 7.5 centimeters) layer of MulchMulch, ensuring it doesn’t touch the hosta’s crown to prevent rot.
Watering Routine
Proper watering is vital during and after transplanting. Before moving the hosta, water it thoroughly to reduce stress during the transplant process. After transplanting, continue to water regularly to keep the soil moist but not waterlogged for the first few weeks until the plant becomes established.
Hosta Divisions: Mastering the Art of Splitting and Transplanting
Hostas, like many perennial plants, have the unique ability to be divided and transplanted, making them a versatile addition to any garden. The division helps rejuvenate mature plants and allows gardeners to propagate and expand their hosta collection. Mastering the art of hosta divisions involves understanding the right timing, proper techniques, and aftercare to ensure the successful transplant of these resilient plants. Let’s delve into the step-by-step process of splitting and transplanting hostas:
Choosing the Right Time
Hostas are best divided and transplanted during their dormant season, typically in early spring or late fall. Avoid dividing them during the summer heat, as it can stress the plants and hinder their establishment.
Preparing the Hosta
Before starting the division process, thoroughly water the hosta a day or two in advance. Moist soil makes separating the plant’s roots easier without causing excessive damage.
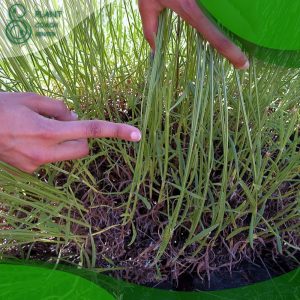
Lifting and Division
Gently dig around the outer perimeter of the hosta clump, creating a trench-like shape. Lift the entire cluster from the Ground, remembering the plant’s roots. Once lifted, carefully shake off excess soil to expose the root structure.
Separating the Divisions
Using a sharp and clean garden knife or spade, divide the hosta clump into smaller sections. Each division should have sufficient healthy roots and multiple shoots or “eyes” (the growing points).
Transplanting
Choose the new planting locations and dig holes wide enough to accommodate the divided hostas’ root systems. Place each division into its hole, ensuring the crown (where the roots meet the shoots) is at ground level. Backfill with soil and gently press it down to remove air pockets.

Watering and Mulching
Water the newly transplanted hostas thoroughly to help settle the soil and promote root growth. Apply a layer of organic MulchMulch around the transplants to conserve moisture and protect the young plants.
Post-Transplant Care
Keep a close eye on the newly divided hostas and provide adequate water during the initial weeks. While establishing themselves, avoid disturbing the plants or allowing them to dry out.
From Pot to Ground: The Delicate Process of Moving Potted Hostas
Moving potted hostas from their confined nursery homes to the open Ground can be exciting yet delicate. Whether you’re bringing home a new potted hosta or looking to transplant an existing one, careful handling, and proper techniques are essential to ensure a smooth transition and the plant’s continued health. Here’s a step-by-step guide to successfully moving potted hostas into the Ground:
Timing is Key
The best time to transplant potted hostas into the Ground is during their dormant season in early spring or late fall. This allows them to establish their root systems before the growing season demands kick in.
Site Selection
Choose a suitable location for your hosta in the garden. Hostas prefer partial to full shade, with well-draining soil rich in organic matter. Avoid areas with direct sunlight or excessively wet soil, as these conditions can stress the plant.
Preparing the Hole
Dig a hole in the Ground slightly larger than the potted hosta’s root ball. Loosen the soil at the bottom of the hole to aid root penetration and growth.
Gently Remove the Hosta
Carefully remove the hosta from its pot by turning it upside down while supporting the plant’s base. Gently tap the bottom of the pot to help loosen the root ball, and then ease the plant out.
Inspecting the Roots
Examine the roots of the potted hosta. If you notice any encircling roots or bound soil, gently tease them to encourage outward growth. This prevents the roots from continuing to grow in circles once in the Ground.
Planting in the Ground
Place the hosta’s root ball into the prepared hole and adjust its position to ensure it sits at the same depth as in the pot. Backfill the hole with soil, gently tamping it around the plant to remove air pockets.
Watering and Mulching
thoroughly Water the newly planted hosta to settle the soil and promote root establishment. Apply a layer of organic MulchMulch around the plant to retain moisture and regulate soil temperature.
Post-Planting Care
Keep a close eye on the newly transplanted hosta during its initial weeks in the Ground. Ensure the plant receives adequate water and provides shade or shelter if solid sunlight or adverse weather conditions occur.
Transplant Troubleshooting: Common Issues and Solutions for Healthy Hostas
Transplanting hostas can be a rewarding experience, but like any gardening endeavor, challenges may arise. Fortunately, most issues can be resolved with simple troubleshooting and attentive care. Let’s explore common problems that may occur during hosta transplantation and the corresponding solutions to ensure the health and well-being of your beloved plants:
Wilting and Transplant Shock
Hostas are sensitive to the stress of being transplanted, which can cause wilting and temporary shock. To combat this, water the hostas generously before and after transplanting to help them retain moisture. Consider providing some temporary shade during the hottest part of the day to reduce stress while they adjust to their new environment.
Yellowing Leaves
Yellowing leaves post-transplant can be a sign of overwatering or underwatering. Strike a balance by ensuring the soil is consistently moist but not waterlogged. Proper drainage is essential to prevent root rot. Additionally, consider using a balanced fertilizer to provide nutrients for healthy leaf growth.
Root Damage
Hosta roots may experience damage during the transplant process. Handle the sources gently to minimize this, and avoid excessively rough removal from pots or the Ground. Ensure the new planting hole is adequately sized to accommodate the root ball without cramping or bending the roots.
Pest Infestations
Newly transplanted hostas may attract pests seeking tender growth. Inspect the plants regularly for signs of problems like aphids, slugs, or snails. Take prompt action using organic pest control methods or appropriate treatments if detected.
Disease Concerns
Fungal diseases, such as root rot or crown rot, can occur during transplantation. To prevent illness, choose well-draining soil, avoid overwatering, and ensure good air circulation around the plants. If you suspect an infection, promptly remove affected leaves or sections and consider using fungicides as a preventive measure.
Unfavorable Weather Conditions
Extreme weather, such as heavy rainfall or heat waves, can stress newly transplanted hostas. Mulching around the plants helps retain soil moisture and protects against temperature fluctuations. Providing temporary shelter or coverage in severe weather can help the hostas acclimate.
Soil Issues
Transplanting hostas into poor-quality soil can hinder their growth. Improve the soil’s fertility and structure by adding organic matter like compost or well-rotted manure. This enhances nutrient availability and promotes healthy root development.
Conclusion
In conclusion, hosta transplantation is the key to unlocking a world of beauty and charm in your garden. By understanding the optimal timing for transplanting, carefully selecting suitable weather conditions, and preparing the soil with the proper nutrients, you set the stage for these versatile perennials to thrive.
Whether dividing and conquering to expand your hosta collection or delicately moving potted hostas to the Ground, mastering the techniques and troubleshooting potential issues ensures a successful transition. Remember to provide post-transplant care and remain attentive to your hostas’ needs as they settle into their new environment.
As you embark on this horticultural journey, visit PlantCouchCenter.com for more gardening tips and inspiration to elevate your outdoor sanctuary. With dedication and a touch of a green thumb, you’ll witness the enchanting beauty of hostas unfolding year after year, creating a captivating tapestry that leaves a lasting impression on all who behold it.
When is the best time to transplant hostas?
The best time is during their dormant season in early spring or late fall.
Can I transplant hostas in the hot summer months?
It's not recommended, but if necessary, choose early morning or late evening for milder temperatures.
How do I divide and transplant hostas successfully?
Gently lift the hosta, divide the clump, and transplant to well-prepared soil with good drainage.