
When Can You Transplant Irises
Delicate and captivating, irises add a touch of elegance and charm to any garden landscape. As these perennial beauties grow and multiply, the time may come when you wish to transplant them to new locations, either to enhance their display or to propagate them for sharing with fellow garden enthusiasts. However, transplanting irises requires a careful approach to ensure their successful adaptation and continued flourishing.
This comprehensive guide will explore the art of transplanting irises, from understanding the ideal timing for the endeavor to mastering the techniques that guarantee their seamless transition. Whether you are a seasoned gardener seeking to revitalize your iris collection or a novice eager to embark on a horticultural adventure, these insights will equip you with the knowledge needed to create a thriving iris haven in your garden.
So, roll up your sleeves, grab your gardening tools, and delve into the fascinating world of iris transplantation to unleash the full potential of these resplendent blooms.
Timing Matters: The Ideal Season for Transplanting Irises
Transplanting irises is a rewarding endeavor that requires careful consideration of the ideal season to ensure the success of the process. The best time to transplant irises largely depends on the region’s climate and the specific iris variety you are working with. Generally, iris transplantation has two optimal seasons: late summer to early fall and late winter to early spring.
Late Summer to Early Fall Transplantation
Late summer to early fall, typically August through September, is an excellent time to transplant irises in many regions. During this period, the weather is relatively mild, and the soil is warm, which encourages the development of new roots before winter sets in.
Transplanting during late summer also allows the irises to recover from the shock of Transplantation before the colder months, leading to a better chance of survival. Gardeners should aim to transplant irises at least four to six weeks before the first hard frost in their Area to give the plants ample time to establish themselves.
Late Winter to Early Spring Transplantation
For regions with harsh winters or sweltering summers, late winter to early spring, around February through March, provides another suitable window for iris transplantation. During this time, the irises are dormant, and the weather is cooler, reducing the stress on the plants during the transplantation process. Transplanting in late winter or early spring allows the irises to take advantage of the upcoming growing season to establish their roots and prepare for a robust spring or early summer bloom.
Factors to Consider
When determining the ideal time to transplant irises, it is crucial to consider your local climate, weather patterns, and the specific needs of the iris variety. The late summer and late winter options may be viable in regions with mild temperatures. However, it is best to avoid fall transplantation in colder areas, as the plants may need more time to establish their root systems before winter freezes.
Preparing the Ground: Creating the Perfect Bed for Your Transplanted Irises
A successful transplant begins with creating a well-prepared bed for your irises to call their new home. The right soil conditions and bed preparation are vital for their growth and development. Follow these essential steps to create the perfect bed for your transplanted irises:
Choose the Right Location
Select a location in your garden that receives at least six hours of direct sunlight daily. Irises thrive in full sun, which helps promote healthy growth and vibrant blooms. Ensure the Area is well-draining to prevent waterlogged soil, as irises dislike standing water.
Clear the Area
Before transplanting, clear the chosen Area of any weeds, debris, or unwanted plants. Competition from weeds can hinder iris growth, so providing them with a clean, weed-free space is crucial.
Soil Preparation
Irises prefer well-draining, fertile soil with a slightly acidic to neutral pH (around 6.0 to 7.0). Test the soil to determine its pH level and make amendments if necessary. Mix in organic matter, such as compost or well-rotted manure, to improve soil structure and fertility. This will also enhance the soil’s ability to retain moisture without becoming waterlogged.
Create Raised Beds
Consider creating raised beds for your irises, especially if you have heavy clay soil or poor drainage. Raised beds help improve soil aeration and drainage, reducing the risk of root rot and other water-related issues.
Spacing and Depth
When transplanting irises, ensure that each rhizome (the thick, fleshy root-like structure) has enough space to grow. Space them about 12 to 18 inches apart for adequate airflow and sunlight. Plant the rhizomes below the soil surface, ensuring they are not buried too deep or exposed above the ground.
Mulching
Apply a thin layer of organic mulch around the transplanted irises. Mulch helps retain soil moisture, suppress weed growth, and regulate temperature. Avoid piling mulch directly against the rhizomes to prevent rotting.
Watering
After planting, water the irises thoroughly to settle the soil and promote root establishment. During the initial weeks after Transplantation, keep the soil moist but not waterlogged. Once the irises are well-established, they will require less frequent Watering.
Lifting with Care: Proper Techniques for Transplanting Irises
Transplanting irises requires a delicate touch to ensure minimal stress on the plants and maximize their chances of thriving in their new location. The process involves lifting and dividing the iris rhizomes, the thick, fleshy root-like structures that store nutrients for the plant. Follow these proper techniques to transplant irises with care:
Choose the Right Time
Transplant irises during their dormant period when they are not actively growing. This typically occurs in late summer to early fall or late winter to early spring, depending on your region’s climate.
Prepare the Iris Bed
Before lifting the irises, prepare the new planting bed following the guidelines outlined in the previous section. Having the new bed ready will allow for a smooth transition once the rhizomes are lifted.
Water the Irises
A day or two before transplanting, water the irises thoroughly. Moist soil makes it easier to lift the rhizomes without causing damage to the roots.
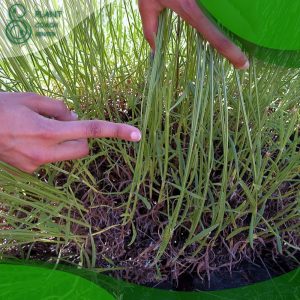
Digging Up the Rhizomes
Using a spade or garden fork, carefully dig around the clump of irises, creating a wide circle to avoid damaging the rhizomes. Gently lift the cluster from the soil, not breaking or cutting the rhizomes. If the clump is too large, you can divide it into smaller sections for transplanting.
Inspect and Trim Rhizomes
Examine the lifted rhizomes for any signs of damage, rot, or disease. Healthy rhizomes should be firm and free from soft spots or discoloration. Trim off any damaged or diseased parts using a sharp, clean knife or pruning shears.
Division of Rhizomes
If you have a large iris clump, you can divide it into smaller sections to create new plants. Each division should have at least one healthy fan of leaves and several firm, healthy roots. Trim the leaves to around six inches in length to reduce stress on the newly transplanted rhizomes.
Transplanting the Rhizomes
Plant the iris divisions in the prepared bed, ensuring they are at the appropriate Depth below the soil surface. Space the rhizomes 12 to 18 inches apart for proper air circulation.
Watering and Mulching
After transplanting, water the irises thoroughly to help settle the soil around the roots. Apply a thin layer of mulch around the newly transplanted rhizomes to conserve moisture and suppress weed growth.
Sun or Shade: Finding the Right Spot for Your Transplanted Irises
When choosing a location for your transplanted irises, it’s crucial to consider their sunlight requirements to ensure they thrive and produce spectacular blooms. Like many plants, Irises have specific preferences regarding sun exposure, and finding the right spot can significantly impact their growth and flowering. Here’s what you need to know about determining whether your irises prefer sun or shade:
Full Sun for Optimal Blooms
Most iris varieties flourish when planted in full sun, which means they need at least six to eight hours of direct sunlight daily. Total sun exposure stimulates robust foliage growth and encourages the development of vibrant, eye-catching blooms. When irises receive ample sunlight, they tend to have stronger stems and more prominent flowers, creating a breathtaking display in your garden.
Partial Shade for Some Varieties
While many irises prefer full sun, some varieties can tolerate partial shade. These varieties thrive with about four to six hours of sunlight per day. If you need more clarification about the sunlight requirements of a specific iris variety, refer to the plant tag or conduct research to identify the optimal conditions for that particular type.
Sunlight and Climate Considerations
The amount of sunlight your irises need can also depend on your region’s climate. In hot summers, providing shade during the hottest day can help prevent plant stress. Conversely, in cooler temperatures, more sunlight may benefit optimal growth.
Avoid Deep Shade
While irises can tolerate partial shade, they should not be planted in deep or heavy shade for extended periods. Insufficient sunlight can lead to weak growth, sparse flowering, and increased disease susceptibility.
Protection from Strong Winds
Regardless of the sunlight requirements, consider protecting your irises from strong winds, especially if you live in an area prone to gusts. Strong winds can damage delicate blooms and may cause the tall stems to bend or break.
Observing Your Garden’s Sunlight Patterns
Before transplanting your irises, observe your garden throughout the day to determine which areas receive full sun and have partial shade. This will help you select the best spot for your irises based on their specific sunlight needs.
Watering Wisely: Irrigation Tips for Newly Transplanted Irises
Proper irrigation is essential for successfully establishing and growing newly transplanted irises. Finding the right balance between keeping the soil adequately moist and avoiding overwatering is crucial to ensure that the irises develop healthy root systems and vibrant blooms. Follow these irrigation tips to water your transplanted irises wisely:
Initial Watering
Immediately after transplanting your irises, give them a thorough watering to settle the soil around the roots. This initial Watering helps eliminate air pockets and ensures good soil-to-root contact, promoting successful root establishment.
Frequent Watering in the First Weeks
During the first few weeks after Transplantation, monitor the soil’s moisture level regularly. Newly transplanted irises need consistent moisture to establish their root systems, so water them when the top inch of soil feels dry. Depending on your climate and weather conditions, this might mean initially watering every two to three days.
Avoid Waterlogged Soil
While adequate moisture is essential, be cautious not to overwater the irises, as waterlogged soil can lead to root rot and other problems. Ensure the planting area has well-draining ground to prevent excess water from pooling around the roots.
Gradually Reduce Watering Frequency
As the irises become established and show signs of new growth, gradually reduce the frequency of Watering. Once they have developed robust root systems, they will require less frequent Watering.
Deep Watering vs. Light Sprinkling
When you water your irises, aim for deep Watering rather than light sprinkling. Deep Watering encourages the roots to grow deeper into the soil, making the plants more resilient to dry spells. Water the base of the plants rather than wetting the foliage to reduce the risk of fungal diseases.
Mulching for Moisture Retention
Applying a layer of organic mulch around the transplanted irises can help retain soil moisture and reduce evaporation. Mulch also helps suppress weed growth, which can compete with irises for water and nutrients.
Watering in the Morning
Water your irises in the Morning rather than in the evening. Watering in the Morning allows the foliage to dry during the day, reducing the risk of fungal diseases that thrive in damp conditions.
Drought Tolerance of Irises
Once established, many iris varieties are relatively drought-tolerant. However, if your Area experiences prolonged dry spells, consider providing supplemental irrigation during these times to support their health and blooming potential.
Troubleshooting Transplants: Common Issues and Solutions for Irises
Transplanting irises can be a rewarding experience, but like any gardening endeavor, it comes with its share of challenges. While irises are generally resilient plants, they may encounter specific issues after Transplantation. Being aware of these common problems and their solutions will help you ensure the successful establishment and continued health of your transplanted irises:
Wilting after Transplantation
Issue: It’s common for irises to show signs of wilting shortly after being transplanted. Transplant shock can cause temporary wilting due to the disturbance of their root systems.
Solution: Provide your newly transplanted irises with a deep watering immediately after Transplantation to help them recover from the shock. Continue to water them consistently until they show new growth and improved vigor.
Pest Infestations
Issue: Irises are susceptible to pests such as iris borers, aphids, and thrips. These pests can damage the foliage and flowers, reducing Blooming and overall health.
Solution: Regularly inspect your irises for signs of pest infestations, including holes in the leaves or distorted growth. If you spot any pests, take appropriate measures to control them, such as using insecticidal soaps or neem oil.
Fungal Diseases
Issue: Fungal diseases like root rot or iris leaf spot can affect irises, especially in wet or humid conditions. Overwatering or poor air circulation can contribute to the development of these diseases.
Solution: Avoid overwatering and ensure the soil has good drainage. Water the irises at the base of the plants to keep the foliage dry. If you notice signs of fungal diseases, remove and destroy affected plant parts and consider using fungicides as a preventive measure.
Poor Blooming
Issue: If your transplanted irises fail to produce blooms or have diminished blooming, several factors may be at play, such as insufficient sunlight, overcrowding, or nutrient deficiencies.
Solution: Ensure your irises receive the appropriate amount of sunlight based on their specific requirements. If overcrowding is an issue, divide, and space out the rhizomes to provide adequate room for growth. Use a balanced fertilizer or compost to enrich the soil with essential nutrients and promote Blooming.
Soil Compaction
Issue: Soil compaction around the transplanted irises can hinder root growth and nutrient absorption.
Solution: Regularly loosen the soil around the rhizomes using a small garden fork or trowel to improve soil aeration and root penetration.
Insufficient Winter Protection
Issue: In colder climates, irises may suffer from frost damage or inadequate protection during the winter months.
Solution: Apply a layer of mulch around the base of the plants before winter to insulate the rhizomes from freezing temperatures. Consider using protective covers or bringing potted irises indoors during the coldest months in icy regions.
Conclusion
In conclusion, successfully transplanting irises is a gratifying journey that requires careful planning, Preparation, and attentive care. By understanding the ideal timing for Transplantation, creating a suitable bed with well-draining soil, lifting and dividing the rhizomes with respect, and choosing the right location based on sunlight requirements, gardeners can set their irises on a path to flourish and delight.
Moreover, wise irrigation practices ensure the establishment of robust root systems while troubleshooting common issues like wilting, pest infestations, and fungal diseases empowers gardeners to overcome challenges that may arise. As you embark on this horticultural adventure, remember that patience and persistence are vital when tending to these remarkable blooms.
Plantcouchcenter.com encourages gardening enthusiasts to explore the world of iris transplantation, allowing these enchanting flowers to grace their gardens with their timeless allure and captivating hues. So, roll up your sleeves, embrace the wonders of nature, and immerse yourself in the colorful world of irises to witness the magic of these floral wonders blooming to their fullest potential.
When is the best time to transplant irises?
The ideal times for transplanting irises are late summer to early fall and late winter to early spring, depending on your region's climate.
How often should I water newly transplanted irises?
Water newly transplanted irises regularly, keeping the soil consistently moist in the first few weeks until they establish their root systems.
What should I do if my irises are wilting after transplanting?
Provide a deep watering immediately after transplanting to help the irises recover from shock. Keep watering consistently until they show signs of new growth and vigor.