
When Do You Plant Butternut Squash?
As the sun-kissed days of summer begin to wane, gardeners and enthusiasts eagerly turn their attention to the promise of a bountiful autumn harvest. Among the many delights this season has to offer, the butternut squash is a favorite, boasting its sweet, nutty flavor and vibrant orange flesh. However, for those eager to cultivate this delectable and versatile vegetable, the timing of planting plays a critical role in determining the success of their harvest.
Understanding when to plant butternut squash is essential, as it ensures that the plants thrive in their growing environment and reach their full potential. In this article, we delve into the art of sowing butternut squash, exploring the optimal planting windows, the preparation required for a flourishing crop, and the nurturing care needed to yield a plentiful harvest.
Whether you’re a seasoned gardener or a novice green thumb, this comprehensive guide will equip you with the knowledge and confidence to embark on cultivating your own butternut squash haven. So, let’s dig in and uncover the secrets of perfect timing for planting this beloved autumn gem!
Timing for Success: Understanding the Ideal Planting Window
When it comes to planting butternut squash, timing is everything. The ideal planting window for butternut squash is crucial to ensure that your plants have ample time to grow and mature before the first frost sets in. Butternut squash thrives in warm weather but is also sensitive to ice and cold temperatures. Therefore, planning your planting schedule based on your local climate and frost dates is essential.
The general rule of thumb is to plant butternut squash after all danger of frost has passed and the soil has warmed up. As a warm-season vegetable, butternut squash prefers soil temperatures around 60 to 70°F (15 to 21°C) for successful germination and growth. Planting too early, when the soil is still excellent, can lead to slow growth or even seed rot.
Planting butternut squash in late spring or early summer is ideal for most regions. This timing allows the plants to take advantage of the warmer temperatures and longer days of the growing season. In colder climates or areas with short growing seasons, starting seeds indoors a few weeks before the last expected frost date can give your plants a head start.
To find the best planting time for your location, consult your local agricultural extension office or use online gardening resources that provide frost date calculators. These tools will help you determine the average last frost date in the spring and the first frost date in the fall, enabling you to plan your planting schedule accordingly.
Preparing the Perfect Bed: Soil and Site Selection
A thriving butternut squash crop begins with a well-prepared bed that offers the ideal soil conditions and an optimal site for growth. Butternut squash is a heavy feeder, so choosing the suitable soil and location is essential for ensuring robust plants and a bountiful harvest.
Soil Requirements
Butternut squash thrives in rich, well-draining soil. Before planting, amend the soil with organic matter, such as compost or well-rotted manure, to improve its nutrient content and structure. This provides essential nutrients and enhances the soil’s ability to retain moisture without becoming waterlogged. Avoid heavy clay soils that tend to hold onto water, as this can lead to root rot and other moisture-related issues.
Soil Preparation
Prepare the bed by removing any weeds, rocks, or debris that may interfere with the growth of the squash plants. Work the soil to a depth of at least 12 inches (30 cm) to allow for adequate root penetration and to ensure good aeration. Rake the surface to create a smooth, even planting area, making it easier for the seeds to establish robust root systems.
Sunlight and Space Considerations
Butternut squash is a sun-loving plant and requires a minimum of 6 to 8 hours of direct sunlight daily. When choosing a site, look for an area in your garden that receives ample sunlight throughout the day. Additionally, ensure the planting area has enough space for the sprawling vines to spread. The plants can take up quite a bit of space, so plan for adequate room between each plant, typically about 3 to 4 feet (1 to 1.2 meters) apart.
Soil pH
The optimal pH range for butternut squash is 6.0 and 7.0, slightly acidic to neutral. Testing the soil’s pH can be beneficial, as it allows you to make any necessary adjustments to ensure your plants have access to essential nutrients. You can find soil testing kits at garden centers or utilize soil testing services provided by agricultural extension offices.

From Seed to Sprout: Starting Butternut Squash Indoors
Starting butternut squash indoors offers several advantages, especially in regions with shorter growing seasons or cooler climates. By providing a head create for your plants, you can extend the growing period and increase the likelihood of a successful harvest. Here’s a step-by-step guide on how to start butternut squash from seeds indoors:
Seed Selection
Begin by selecting high-quality butternut squash seeds from a reputable source. Look for varieties that are well-suited to your growing zone and climate. If you saved seeds from a previous harvest, ensure they are fully mature, properly dried, and stored in a cool, dry place.
Timing
Start indoor seed sowing approximately 4 to 6 weeks before your area’s last expected frost date. This gives the roots enough time to germinate and grow into sturdy seedlings before transplanting them outdoors.
Seed Starting Containers
Choose biodegradable seedling pots or cell trays to start your seeds. These containers make transplanting easier, as you can plant the entire container directly into the ground without disturbing the delicate roots.
Soil Mix
Use a high-quality seed-starting mix or create your own by combining equal parts of peat moss, vermiculite, and perlite. This lightweight mix provides excellent aeration and moisture retention, promoting healthy seedling development.
Sowing Seeds
Plant two to three seeds per container at a depth of about 1 inch (2.5 cm). Water the soil lightly after sowing, ensuring it’s evenly moist but not waterlogged.
Warmth and Light
Place the seed containers in a warm location with temperatures around 70 to 80°F (21 to 27°C). You can use a seedling heat mat to maintain consistent warmth for optimal germination. Additionally, provide ample light by placing the containers under grow lights or near a sunny windowsill. Seedlings need at least 14 to 16 hours of sunshine per day.
Thinning Seedlings
Once the seedlings emerge and develop their first set of true leaves, thin them out, keeping only the strongest seedling in each container. Gently snip off the weaker ones at the soil level to avoid disturbing the roots of the chosen plant.
Transplanting Outdoors
When the danger of frost has passed and the soil has warmed up, it’s time to transplant the seedlings outdoors. Harden off the seedlings by gradually exposing them to outdoor conditions for 7 to 10 days. Plant them in the prepared garden bed, ensuring the recommended spacing between plants.
Embracing the Outdoors: Direct Sowing Techniques
Direct sowing is a straightforward and rewarding method for planting butternut squash directly into the garden soil. By bypassing the indoor seed-starting process, you allow the plants to experience natural conditions from the beginning, which can lead to hardier and more resilient growth. Here’s a guide to mastering the art of direct sowing butternut squash:
Timing
Wait until the danger of frost has passed and the soil has warmed to at least 60°F (15°C) before direct sowing butternut squash seeds. Planting too early in the cold ground can lead to poor germination and slow growth.
Soil Preparation
Choose a planting area with well-draining, fertile soil that receives full sun. Remove any weeds and loosen the dirt to a depth of 12 inches (30 cm). Incorporate compost or organic matter into the soil to enrich it with essential nutrients and enhance moisture retention.
Spacing
Butternut squash plants require space to spread their vines and produce healthy fruits. Leave about 3 to 4 feet (1 to 1.2 meters) between each plant and allow at least 6 to 8 feet (1.8 to 2.4 meters) between rows.
Sowing Seeds
Dig small holes in the soil, about 1 inch (2.5 cm) deep, and space the holes according to the recommended plant spacing. Place two to three seeds in each hole and cover them with soil. Water the area gently after sowing to ensure good seed-to-soil contact.
Thinning Seedlings
Once the seedlings emerge and grow their first true leaves, thin them out, leaving the healthiest plant in each planting spot. Snip off the weaker seedlings at the soil level, being careful not to disturb the roots of the chosen plant.
Watering
Keep the soil consistently moist but not waterlogged. Adequate watering is crucial during the germination and early growth stages. Adjust watering as the plants develop and become established to ensure the soil remains evenly moist.
Mulching
Apply a layer of organic mulch around the base of the plants once they have grown a few inches tall. Mulching helps retain soil moisture, suppress weeds, and maintain even temperatures.
Pest Protection
Monitor the plants regularly for signs of pests or diseases. If necessary, utilize natural pest control methods or organic insecticides to protect your butternut squash from potential threats.
Nurturing Nature’s Bounty: Butternut Squash Plant Care
Successfully growing butternut squash continues after planting; it requires consistent care and attention throughout its growth cycle. You can ensure healthy, vigorous plants that produce an abundant harvest of sweet and flavorful squash by providing the proper care. Here’s a comprehensive guide to nurturing nature’s bounty and maximizing your butternut squash yield:
Watering
Butternut squash plants need regular and consistent watering, especially during dry spells. Aim to keep the soil evenly moist but not waterlogged, as excessive moisture can lead to root rot. Water at the base of the plants early in the morning to minimize the risk of disease, as wet foliage can attract pests and fungal issues.
Fertilization
Butternut squash is a heavy feeder, so it benefits from regular fertilization. Use a balanced organic fertilizer or compost tea every few weeks to provide essential nutrients. Be cautious to avoid over-fertilizing, as this can result in excessive foliage growth at the expense of fruit production.
Mulching
Maintain a layer of organic mulch around the base of the plants to retain soil moisture and prevent weed growth. Mulching also helps regulate soil temperatures, keeping the roots cool during hot weather.
Support and Space
As butternut squash plants grow, their vines can become large and heavy. Use trellises or stakes for support to prevent the vines from trailing on the ground and potentially rotting. Additionally, ensure adequate spacing between plants to allow for proper air circulation and to avoid overcrowding.
Pollination
Butternut squash plants rely on pollinators, like bees, to produce fruit. If pollinators are scarce in your area, consider hand-pollinating the female flowers by transferring pollen from the male flowers using a small brush or cotton swab.
Pest and Disease Management
Regularly inspect your plants for signs of pests or diseases. Common butternut squash problems include squash bugs, cucumber beetles, and vine borers. Apply organic pest control methods when necessary and promptly remove any affected leaves or fruits to prevent the spread of diseases.
Pruning
Trim back excessive foliage and remove dead or diseased leaves to promote better airflow and light penetration into the plant canopy. Pruning can also redirect the plant’s energy towards fruit production.
Harvesting
Butternut squash is ready for harvest when the fruit’s skin is complex and the stem has dried and turned brown. Use a sharp knife or pruning shears to cut the squash from the vine, leaving a few inches of stem intact.

Harvesting and Beyond Knowing When Your Butternut Squash is Ready
Harvesting butternut squash immediately ensures peak flavor, texture, and nutritional value. Unlike some vegetables that are best when picked young and tender, butternut squash requires a bit of patience to allow the fruit to fully mature on the vine. Here’s a guide to help you know when your butternut squash is ready to be harvested and how to handle it after picking:
Signs of Ripeness
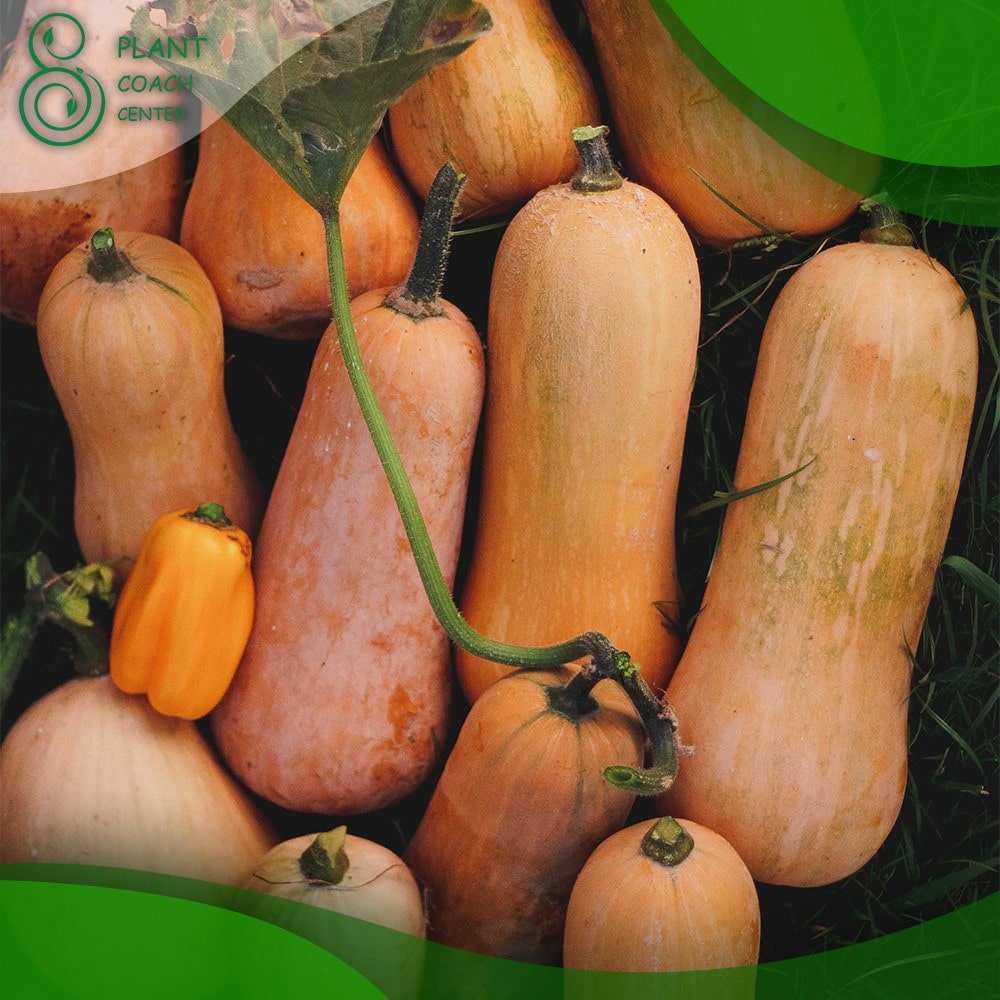
Butternut squash is ready for harvest when it reaches its full size, and the skin has turned a deep, rich color. The fruit should feel firm and solid, indicating that it has matured fully. The stem on the squash should also be dry and brown, a sign that the squash is detached from the vine and ready to be picked.
Harvesting Techniques
Use a sharp knife or pruning shears to cut the butternut squash from the vine, leaving a few inches of stem attached. Be careful not to damage the squash during the harvesting process. Avoid yanking or pulling the squash from the vine, which may cause damage and reduce its shelf life.
Curing
After harvesting, allow the butternut squash to cure for about a week in a warm, dry, and well-ventilated area. This curing process helps toughen the skin, enhances flavor, and extends the squash’s storage life. Ideally, the curing temperature should be around 80°F (27°C) with moderate humidity.
Storage
Once cured, store the butternut squash in a cool, dry, dark place with good airflow. A pantry, root cellar, or basement is suitable for storage. Check the squash periodically for any signs of decay or rot, and remove any affected fruits to prevent spoilage of others.
Culinary Uses
Butternut squash is incredibly versatile in the kitchen, offering a sweet, nutty flavor that complements savory and sweet dishes. It can be roasted, sautéed, pureed into soups, or used in casseroles and stews. Additionally, butternut squash can be used to make delicious pies, muffins, and other baked goods.
Seed Saving
If you wish to save seeds for future plantings, scoop out the seeds from mature butternut squash, rinse them thoroughly, and dry them on a paper towel. Once completely dry, store the seeds in a cool, dark place in a labeled envelope or airtight container.
Conclusion
In conclusion, mastering the art of planting and caring for butternut squash opens up a world of delightful possibilities in the garden and the kitchen. Understanding the ideal planting window, preparing the perfect soil bed, and choosing between direct sowing and indoor seed starting are essential steps to kickstart a successful butternut squash journey.
Nurturing these plants with ample water, proper fertilization, and vigilance against pests and diseases ensures their healthy growth and abundant harvest. Learning the telltale signs of ripeness and the appropriate harvesting techniques guarantee that your butternut squash reaches its full potential in flavor and nutrition. As you savor the sweet rewards of your labor, don’t forget the joy of culinary creativity that this versatile vegetable brings to your recipes.
Whether roasted, blended into soups, or baked into delectable treats, butternut squash enriches your dining table with its delightful taste and nutritional benefits. So, for the complete guide to growing and enjoying this autumn gem, visit PlantCouchCenter.com, where you’ll find a treasure trove of gardening knowledge and tips to make your butternut squash venture truly fruitful and rewarding. Happy gardening and bon appétit!
When is the best time to plant butternut squash?
Plant butternut squash after all danger of frost has passed and the soil has warmed up, typically in late spring or early summer.
Can I start butternut squash indoors?
Yes, starting butternut squash indoors about 4-6 weeks before the last expected frost date can give your plants a head start.
How do I know when my butternut squash is ready to harvest?
Butternut squash is ready to harvest when the skin is firm, the color is deep, and the stem is dry and brown.