
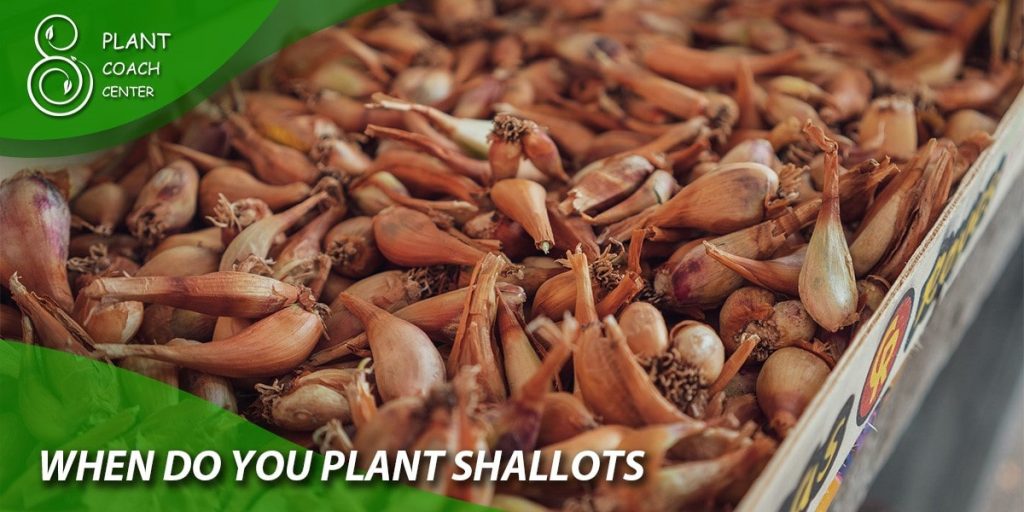
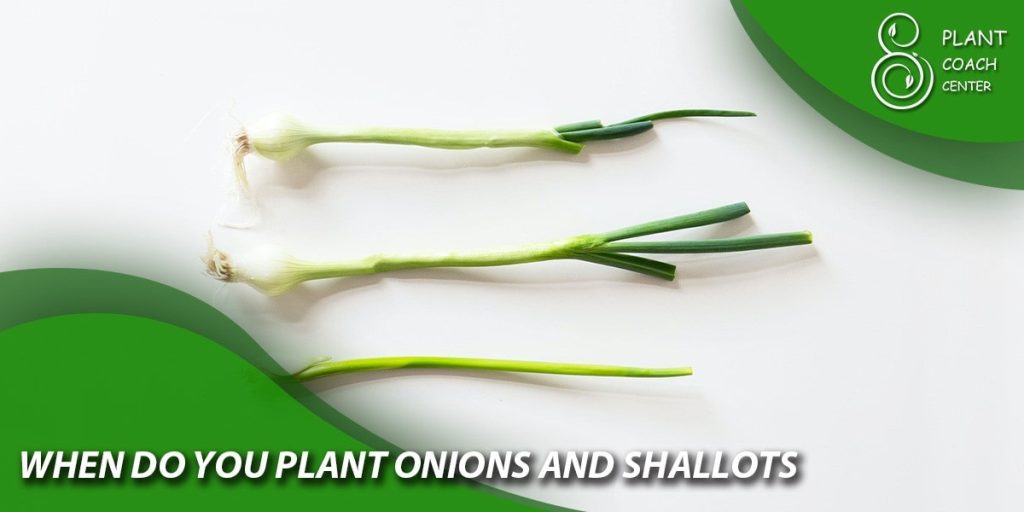
When Do You Plant Shallots?
Welcome to the world of culinary delights and gardening finesse! Shallots, those small but mighty members of the allium family, bring a unique and enchanting flavor to many dishes, captivating the palates of chefs and food enthusiasts alike. Beyond their gastronomic allure, shallots offer a rewarding experience to gardeners willing to embrace their cultivation.
As you embark on the journey of planting shallots, the timing of this endeavor plays a pivotal role in the following success. This article unveils the secrets of when to plant shallots, delving into the intricate dance between seasons, soil conditions, and growth cycles.
Whether you’re a seasoned gardener or a budding enthusiast, understanding the nuances of shallot planting times will set the stage for a bountiful harvest. Join us as we explore the art and science of nurturing these flavorful bulbs from the moment they find their home on the earth to the satisfying day of harvest. Prepare to unearth a world where culinary artistry meets the joy of hands-in-the-dirt horticulture.
Shallots Unveiled: A Culinary Delight
Shallots are the subtle yet melodious notes that elevate dishes from ordinary to extraordinary in the symphony of flavors that grace our plates.
These small, teardrop-shaped bulbs belong to the allium family, closely related to onions and garlic, but they possess a distinct charm that sets them apart. Shallots are known for their elegant balance of sweet and pungent, a flavor profile that lends depth and complexity to various cuisines across the globe.
Renowned for their culinary versatility, shallots are often considered a chef’s secret weapon, adding flavor layers to simple and intricate recipes. Their delicate taste ensures they don’t overpower the palate, making them a preferred choice in subtle dishes. From classic French sauces like béarnaise to Asian stir-fries and Mediterranean salads, shallots find a place in diverse culinary creations.
The magic of shallots doesn’t end at flavor; their texture and appearance also contribute to their gastronomic allure. Slicing into a shallot reveals multiple cloves, each encased in thin, papery skin. These cloves can be easily separated, making shallots more convenient than traditional onions.
The reddish-brown or golden skin of shallots adds visual appeal to dishes, making them an aesthetically pleasing ingredient in raw and cooked preparations.
While shallots undoubtedly shine in the kitchen, their journey begins in the garden. The timing of planting shallots sets the stage for their growth and eventual culinary contribution. To unlock the full potential of these culinary gems, it’s essential to understand the optimal time to plant them.
Join us as we venture into shallot planting times, exploring the factors influencing their successful cultivation. From the moment they are nestled into the soil to the satisfying day of harvest, discover how the art of gardening intertwines with the art of flavor.
Understanding Shallot Growth Cycles
Like any endeavor, growing shallots is a journey that unfolds in distinct stages, each contributing to the eventual success of your harvest. To embark on this journey confidently, it’s crucial to grasp the nuances of the shallot’s growth cycles, from selecting the suitable variety to nurturing the bulbs through their various phases.
Choosing the Right Shallot Variety
The journey begins with a choice: selecting the shallot variety that suits your culinary and gardening aspirations. Shallots come in various sizes and colors, each with a unique flavor profile. French shallots, for instance, are known for their mild, delicate taste, making them a favorite in gourmet dishes.
On the other hand, Dutch shallots offer a slightly more robust flavor, adding robustness to stews and sauces. Consider your culinary preferences and the conditions of your garden before settling on a variety.
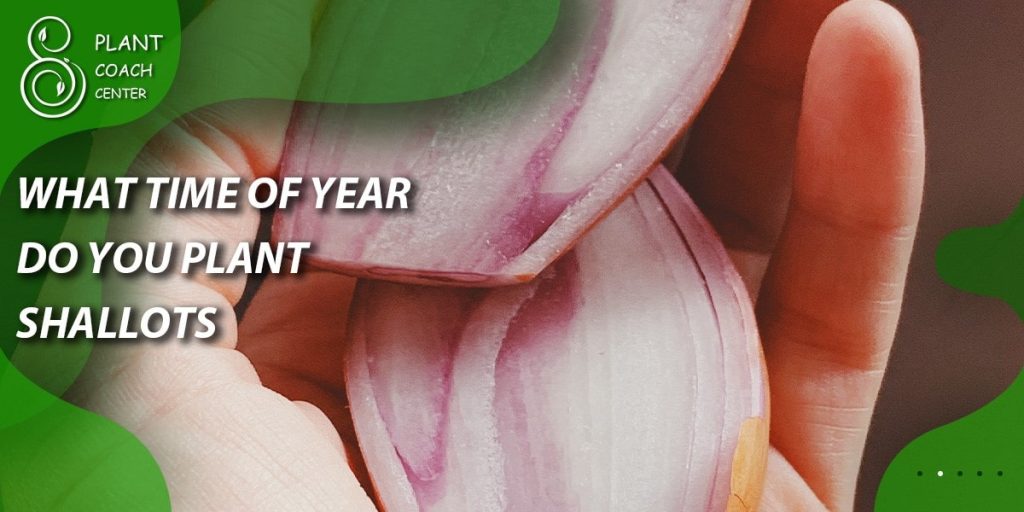
Preparation and Planting
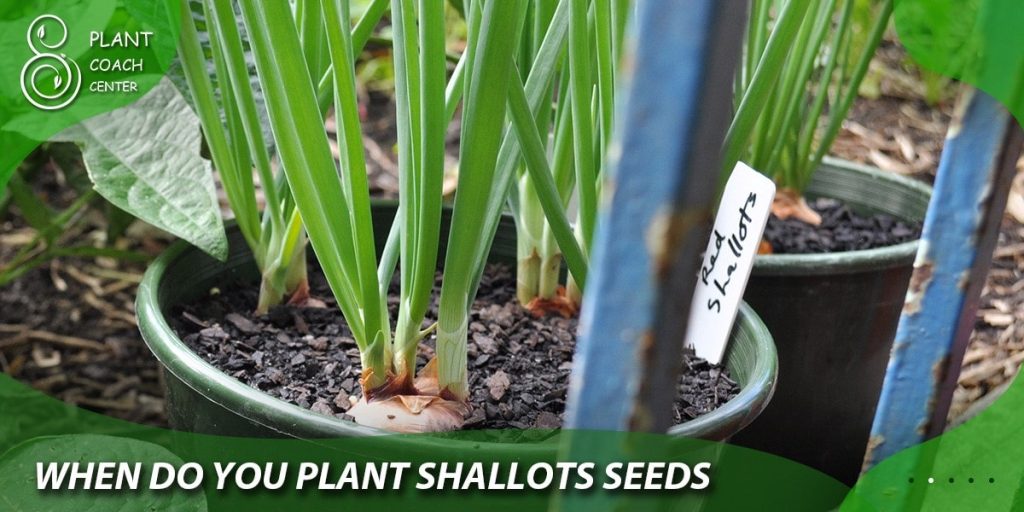
Before planting, prepare the soil diligently. Shallots thrive in well-draining, fertile soil with a pH between 6.0 and 7.0. Incorporate organic matter like compost to improve soil structure and nutrition. Depending on your location and climate, the timing of planting varies.
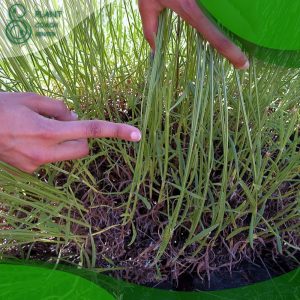
In cooler temperatures, planting in early spring allows shallots to establish their root systems before the summer heat, while fall planting is preferred in milder regions. Plant each shallot clove, pointy side up, about 2 inches deep, and 6-8 inches apart in rows.
Early Growth and Bulb Formation
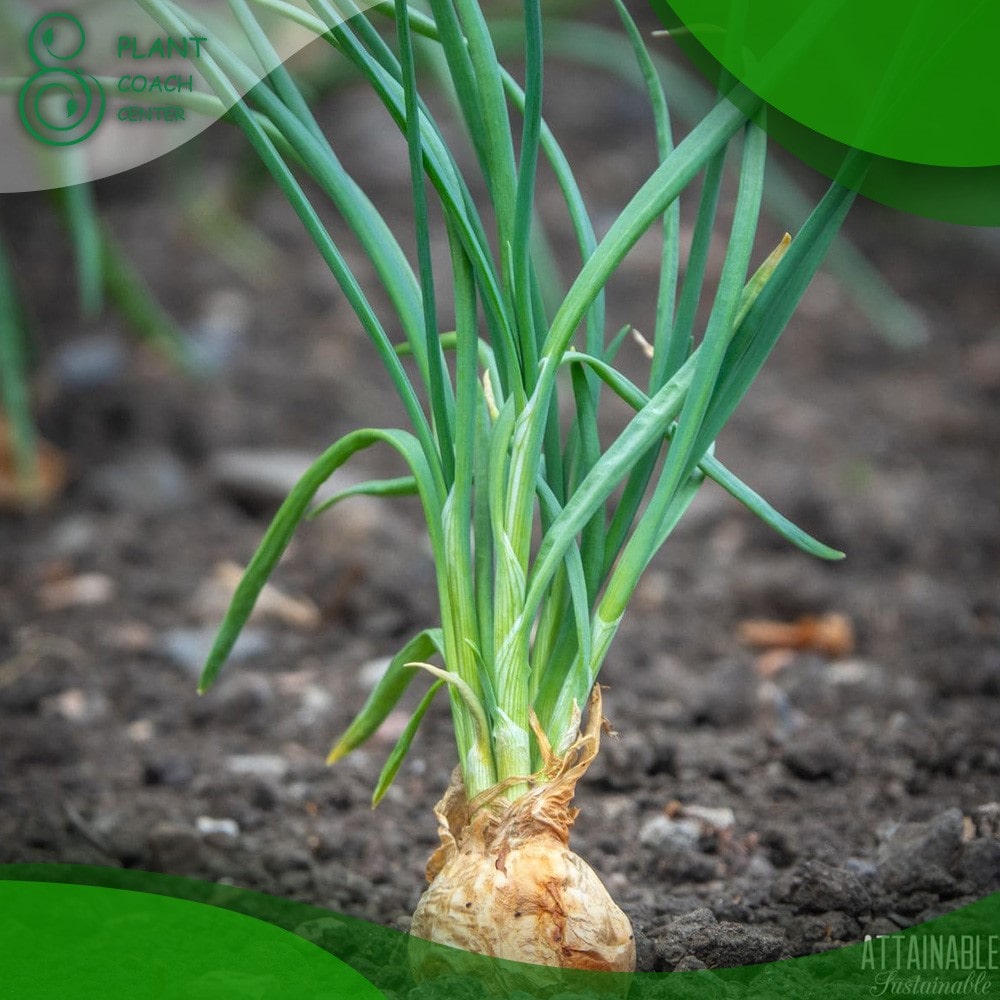
Shallots begin their journey underground once planted. As the weather warms, the shallot’s roots grow, anchoring the plant and drawing in nutrients.
At this stage, keeping the soil consistently moist but not waterlogged is essential. As the plant establishes itself, you’ll notice the development of green shoots above the ground – a promising sign of the shallot’s progress.
Bulbing and Maturation
As the months pass, the green shoots give rise to the bulbs we treasure. Shallots form clusters of bulbs, with each clove swelling and maturing. This phase requires a delicate balance of water and nutrients. Too much water can lead to rot, while too little can result in undersized bulbs. Keep a watchful eye on the shallots’ growth and make adjustments as needed.
Seasonal Symphony: Choosing the Perfect Time to Plant Shallots
In the intricate gardening world, timing is everything, and planting shallots is no exception. The seasons orchestrate a symphony of growth, dictating when and how shallots should be produced to yield a harmonious and abundant harvest. The key to success lies in understanding the interplay between the seasons, the life cycle of shallots, and the unique demands of your local climate.
Spring Serenade
Spring is a season of rebirth and renewal, making it an enticing time to plant shallots. Shallots can establish their root systems before summer heat as the frost retreats and the soil warms. Spring planting is favored in regions with colder winters, ensuring that shallots receive the necessary chilling hours for healthy growth.
By selecting a suitable variety and preparing the soil carefully, you can set the stage for a bountiful summer harvest.
Fall Finesse
In milder climates, where winters are less harsh, fall becomes the prime season for planting shallots. The soil retains its warmth from the summer, providing an ideal environment for shallots to establish themselves before winter dormancy.
Fall-planted shallots benefit from the extended growing season, resulting in more extensive and flavorful bulbs come spring. It’s a dance with the seasons as the shallots quietly grow their roots during the cooler months, ready to burst forth with vitality as the temperatures rise.
Navigating Your Climate
While the general principles of spring and fall planting hold true, your specific climate should guide your decision. Consider your area’s average temperatures, frost dates, and growing season length. A local gardening center or agricultural extension office can provide valuable insights tailored to your region.
Remember, the goal is to align your planting time with consistent, moderate temperatures to ensure the best conditions for shallot growth.
Microclimates and Garden Flexibility
Within any region, microclimates can create variations in temperature and weather conditions. South-facing slopes may warm up earlier in the spring, allowing plants to be planted sooner. Similarly, protected areas allow for extended fall planting. Observing these nuances in your garden can give you a strategic advantage in timing your shallot planting.
Cracking the Soil Code: Soil Conditions for Shallot Success
Beneath the surface of a successful shallot harvest lies a critical factor: the soil. The intricate relationship between shallots and the earth they’re planted in can significantly impact their growth, development, and ultimate flavor. To set the stage for shallot success, it’s essential to decode the secrets of soil conditions and create an environment where these flavorful bulbs can thrive.
Texture Matters
Shallots prefer well-draining soil that balances water retention and aeration. Ground that’s too compacted can lead to waterlogged roots, while excessively sandy soil may drain too quickly, depriving shallots of moisture and nutrients. Aim for a loamy texture – a harmonious blend of sand, silt, and clay – that crumbles easily in your hand.
Sunlight and Drainage
Location matters when it comes to shallot planting. Choose a spot that receives ample sunlight, at least 6 hours a day. Additionally, ensure proper drainage to prevent water accumulation that could lead to root rot. Elevated beds or gently sloping areas can promote drainage while avoiding low-lying spots prone to waterlogging.
pH Precision
Shallots thrive in soil with a slightly acidic to neutral pH, ideally ranging from 6.0 to 7.0. Too acidic or alkaline dirt can impede nutrient absorption, affecting shallot growth. Test your soil’s pH and amend it using organic materials like compost or lime to achieve the optimal range.
Feeding the Future
Nutrient-rich soil provides shallots with the fuel they need to flourish. Before planting, enrich the soil with organic matter such as compost or well-rotted manure. These additions enhance soil structure, promote microbial activity, and gradually release essential nutrients.
During the growing season, consider supplementing with balanced fertilizers that provide nitrogen, phosphorus, and potassium in the proper proportions.
Consistent Moisture
Adequate and consistent moisture is crucial for shallots, especially during their early growth stages. While well-draining soil helps prevent waterlogging, monitoring moisture levels and water accordingly is essential. A layer of organic mulch around the shallot plants can help retain soil moisture, regulate temperature, and discourage weed growth.
Aeration and Airflow
Healthy shallots require good airflow around their foliage. Proper spacing between plants allows air to circulate, reducing the risk of fungal diseases. Additionally, avoid over-watering, which can lead to compacted soil that hinders root growth and aeration.
The Dance of Spacing and Depth: Planting Shallots with Precision
Planting shallots is more than just placing bulbs into the soil; it’s a carefully choreographed dance involving spacing and depth elements. These seemingly small factors profoundly impact shallot growth, bulb development, and the overall yield of your harvest. As you embark on this gardening journey, mastering the art of planting shallots with precision can make all the difference in the final performance.
The Space to Thrive
Like any plants, Shallots require adequate room to grow and spread their roots. Planting shallots too closely can lead to competition for resources and result in smaller bulbs. Aim to produce shallots about 6 to 8 inches apart in rows, allowing ample space for each bulb to develop without crowding. The proper spacing not only promotes healthier growth but also facilitates airflow, reducing the risk of diseases.
Depth of Discovery
Shallots are like nature’s treasure, hidden beneath the soil’s surface. The optimal planting depth is essential to ensure proper root establishment and bulb development. Plant each shallot clove with the pointy end facing upwards, about 2 inches deep. Planting too shallowly may expose bulbs to unfavorable weather conditions while planting too deeply could impede their emergence.
Achieving Uniformity
Consistency is vital when it comes to planting shallots. Using a measuring tool or your judgment, maintain a uniform spacing and planting depth throughout the planting area. This uniformity creates an organized and visually pleasing layout, allowing each shallot bulb equal access to nutrients, sunlight, and water.
The Layered Approach
Shallots often grow in clusters of bulbs, arising from a single planted clove. To encourage the development of multiple bulbs, consider planting multiple cloves in the same hole, separated by the recommended spacing. As each clove grows, it will produce its own cluster of shallots, maximizing your yield.
Mulch Magic
After planting the shallots, consider applying a layer of organic mulch around the plants. This helps retain soil moisture and suppress weeds and provides a protective layer against extreme temperature fluctuations. Just be mindful not to bury the shallots under a thick layer of mulch, as this can hinder their emergence.
Vigilance and Patience
The dance of spacing and depth is not a one-time performance; it’s a commitment that requires ongoing care and patience. As the shallots grow, monitor their progress and make adjustments if needed. Gently thin out any overcrowded areas to maintain the recommended spacing, and ensure that shallots planted too shallowly get gently covered with soil as they grow.
Nurturing Shallots: Care Tips from Planting to Harvesting
As you embark on your journey of shallot cultivation, your role as a gardener extends beyond the initial planting. Nurturing shallots requires consistent attention and care throughout their growth cycle, from when they’re nestled into the soil to the day of harvest. Here’s a comprehensive guide to tending to your shallots, ensuring they thrive, and rewarding you with flavorsome bulbs.
Watering Wisdom
Shallots thrive on consistent, moderate moisture. During their early growth stages, ensure the soil remains evenly moist but not waterlogged. As the plants mature, gradually reduce watering to allow the soil to dry out slightly between watering sessions. A drip irrigation system or a soaker hose can deliver water directly to the roots without wetting the foliage.
Feeding Shallots
To nourish shallots throughout their growth, apply a balanced fertilizer with a formulation such as 10-10-10. Generally, shallots benefit from a light feeding every 4 to 6 weeks. Be cautious not to over-fertilize, as this can lead to excessive foliage growth at the expense of bulb development.
Weed Control
Weeds are uninvited competitors that can steal nutrients and water from your shallots. Regularly weed the area around your shallot plants, particularly during the early stages when they’re establishing their roots. Applying a layer of mulch can further suppress weed growth while helping to retain soil moisture.
Pest Protection
Watch for common pests like aphids, onion thrips, and maggots. Monitor your plants regularly and take action if you notice any signs of infestation. Neem oil, insecticidal soap, or introducing natural predators can help manage pest populations without resorting to harsh chemicals.
Thinning for Airflow
Thinning might be necessary if you’ve planted multiple cloves in the same hole to encourage cluster growth. As the plants grow, crowded clusters can impede airflow and lead to disease. To maintain healthy shallots, gently remove excess plants, leaving space between each set.
Harvesting Shallots
Your efforts culminate when the shallots are ready for harvest. Monitor the foliage for signs of maturity: the bulbs beneath are nearing readiness as it turns yellow and starts to wilt. Carefully lift the shallots from the soil, ideally using a garden fork to minimize damage to the bulbs. Shake off excess dirt and allow the shallots to cure in a dry, well-ventilated area for a few weeks. This curing process enhances flavor and extends its storage life.
Storing Your Harvest
Trim the foliage and roots to about an inch above the bulb once cured. Store shallots in a cool, dark, and well-ventilated place – a mesh bag or a wooden crate works well. Avoid storing shallots in the refrigerator, as the cold and humidity can cause them to sprout prematurely.
Learning from Each Season
Every growing season offers insights into your shallot cultivation journey. Observe which practices yielded the best results, and adjust your approach accordingly. Each year, you’ll refine your care techniques, creating an ever-improving environment for your shallots to flourish.
Conclusion
In the enchanting realm where culinary artistry intertwines with the rhythm of nature, the journey of planting and nurturing shallots unfolds as a testament to the beauty of cultivation. From selecting the perfect variety to orchestrating the dance of spacing and depth and deciphering the secrets of soil conditions to the patient vigilance of care, each step adds a layer of understanding to the art of shallot cultivation.
The symphony of seasons, the delicate balance of nutrients, and the harmony of attentive nurturing all culminate in the moment of harvest – a reward that’s both flavorful and deeply satisfying. As you embark on your own shallot-growing adventure, remember that the guidance and insights provided by PlantCouchCenter.com serve as a valuable companion, offering a wealth of knowledge and expertise to enrich your gardening endeavors.
So, whether you’re a seasoned gardener or a novice enthusiast, may your journey with shallots be a source of delectable dishes and the joy of cultivating nature’s treasures.
When is the best time to plant shallots?
The optimal time to plant shallots depends on your climate. In more excellent areas, plant in early spring; fall planting is preferred in milder regions.
How deep should I plant shallot cloves?
Plant shallot cloves about 2 inches deep with the pointed end facing up. This ensures proper root establishment and bulb growth.
How do I know when shallots are ready for harvest?
Shallots are ready for harvest when their foliage turns yellow and starts to wilt. Carefully lift them from the soil and allow them to cure for a few weeks.