
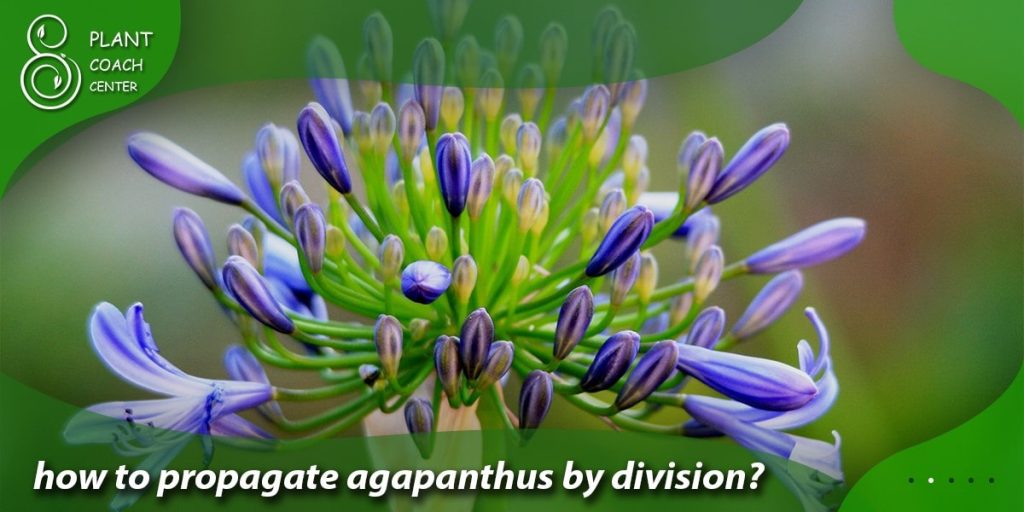
When to Divide Agapanthus?
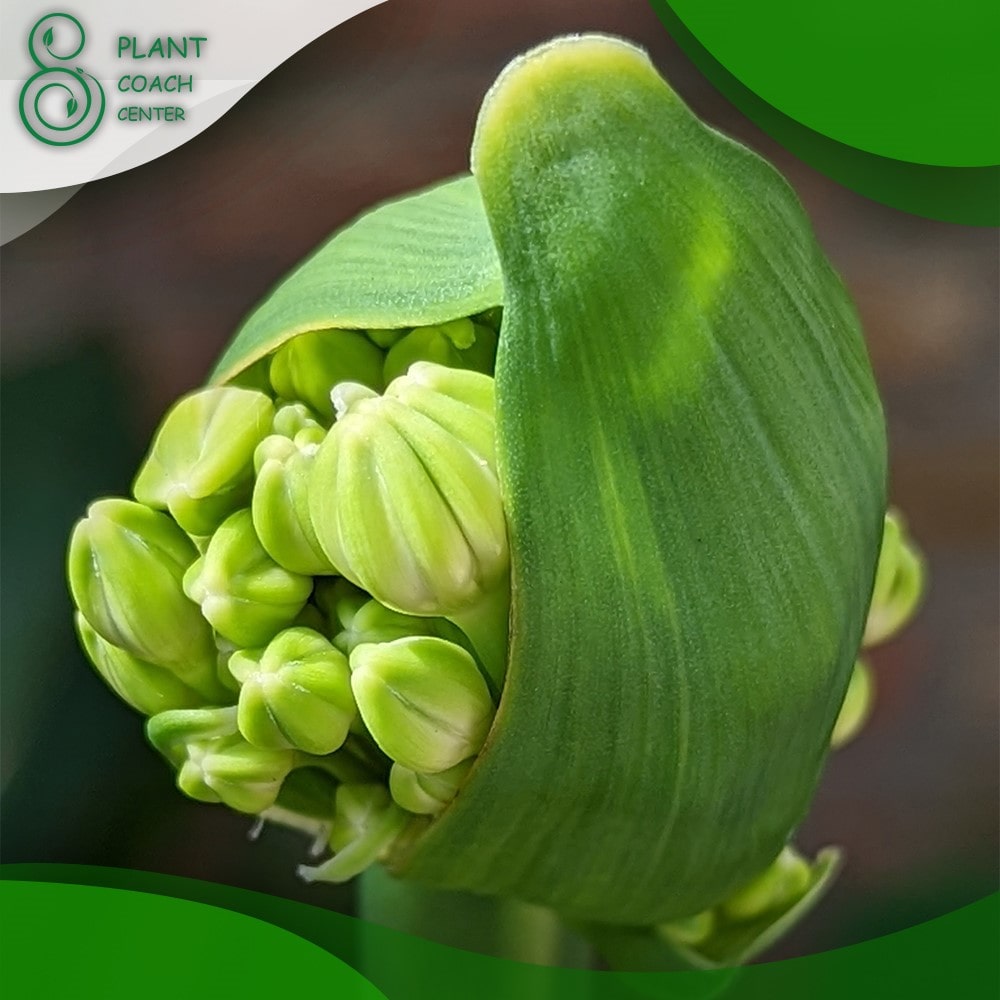
Welcome to the world of agapanthus, where elegance meets resilience in the form of these stunning flowering plants. Agapanthus, commonly known as Lily of the Nile or African lily, graces our gardens and landscapes with its captivating blooms and lush foliage. As guardians of tranquility and natural beauty, we often find ourselves entranced by their presence. Yet, just like any other living wonder, agapanthus requires our care and attention, and one crucial aspect of their well-being is knowing when and how to divide them.
In this intricate horticultural dance, division becomes a transformative act to rejuvenate overcrowded clumps, breathe new life into weary plants, and propagate their splendor to different corners of your garden canvas. Join us as we embark on a journey into agapanthus division, unraveling the art and science behind determining the perfect moment to divide these botanical treasures.
Whether you’re a seasoned gardener seeking to refine your skills or a curious enthusiast ready to explore the secrets beneath the soil, this guide will illuminate the path to successful agapanthus division, ensuring your garden flourishes with enduring vitality.
Signs of Congestion: Recognizing the Need for Division
Agapanthus, with their striking beauty and effortless charm, can occasionally find themselves caught in the throes of congestion. While their growth is a testament to their vitality, an overcrowded clump can lead to compromised health and diminished visual impact. It’s crucial to be attuned to the signs that your agapanthus is yearning for more space to thrive.
Declining Flowering
One of the most evident signs that agapanthus needs division is a decline in its flowering performance. Suppose your once-bountiful blooms have become scarce or lackluster. In that case, it’s a telltale signal that the plant’s resources are stretched thin within a congested clump.
Stunted Growth
Over time, an agapanthus that has outgrown its original planting space may exhibit stunted growth. If you notice that the plant’s leaves are smaller than usual or the overall size seems limited, the roots are likely grappling for room to expand.
Sparse Foliage
Congested agapanthus clumps often display sparse and straggly foliage. This is because individual plants within the clump compete for nutrients, sunlight, and water, leading to uneven growth and a less-than-lush appearance.
Crowded Crowns
Take a close look at the center of the plant. If you see multiple crowns densely packed together, it’s a clear sign of overcrowding. Agapanthus plants should have ample space around their peaks to encourage healthy growth and proper air circulation.
Reduced Vigor
A congested agapanthus may lose vigor and resilience, making it more susceptible to diseases, pests, and environmental stresses. If you observe signs of wilting, discoloration, or increased vulnerability to common garden issues, it’s time to consider division.
Limited Soil Nutrients
When agapanthus plants are packed closely together, their collective demand for nutrients outpaces the soil’s ability to supply. This can result in depleted soil fertility, leading to weaker growth and an overall lack of vitality.
Timing for Success: Choosing the Ideal Season to Divide
Dividing agapanthus is a delicate operation that requires careful timing to ensure the best chances of success. The goal is to minimize plant stress while exploiting their natural growth cycles. Timing is pivotal in determining whether your divided agapanthus will thrive in their new locations. Here’s a closer look at the ideal seasons for this transformative endeavor:
Late Winter to Early Spring
The period just before the growing season kicks into full gear is an excellent time to divide agapanthus. The plant emerges from its dormant state in late winter to early spring (depending on your region’s climate). Dividing at this time allows the newly separated plants to establish their root systems in the warming soil, setting them up for robust growth during the upcoming growing season.
After Flowering
Dividing agapanthus right after they’ve finished flowering is another strategic window. This usually falls in late spring to early summer. By this time, the plants have expended much of their energy on blooming, and they’re gearing up for the summer growth spurt. Dividing at this stage ensures that the plants have enough time to settle into their new spots and put down roots before the heat of summer arrives.
Early Fall
Early fall can also be a suitable time for division in regions with mild climates. As the weather begins to cool down, the agapanthus can be divided without the stress of extreme heat. This allows the plants to establish themselves before the onset of winter and ensures they’ll be well-prepared to resume growth in the following spring.
Pre-Division Preparation: Getting Your Plants Ready
Before embarking on the exciting journey of dividing your agapanthus, it’s essential to ensure that your plants are in the best possible condition. Preparing your agapanthus for division not only enhances their chances of success but also makes the entire procedure smoother. Here’s a comprehensive guide to the pre-division steps you should take:
Assess Plant Health
Begin by evaluating the overall health of your agapanthus. Look for any signs of disease, pest infestations, or stress. It’s essential to divide only healthy plants to prevent the spread of issues among the newly separated individuals.
Watering
Adequate hydration is crucial before division. Water the agapanthus thoroughly for a day or two before dividing them. Moist soil makes it easier to work with the plants and minimizes root stress during the division process.
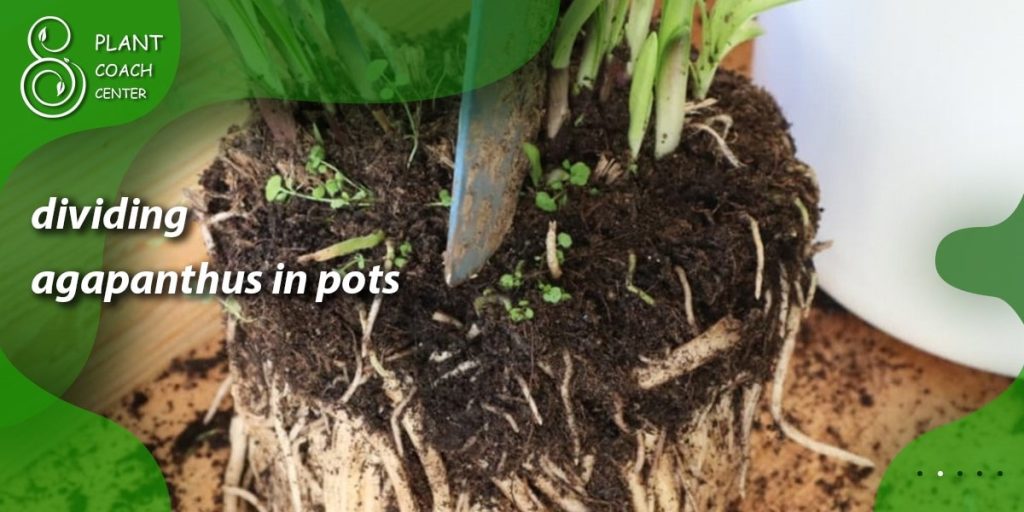
Loosen the Soil
Gently loosen the soil around the base of the agapanthus clump using a garden fork or spade. This loosening makes it simpler to extract the chunk without damaging the roots.
Trim Foliage
To reduce stress on the plant during division, trim the foliage back to about half its height. This lessens water loss through transpiration and focuses the plant’s energy on root establishment after division.
Prepare New Planting Holes
If you’re transplanting the divided agapanthus to new locations, prepare the new planting holes in advance. These holes should be spaced at an appropriate distance from each other to allow ample room for the plants to grow.
Gather Tools
Ensure you have all the necessary tools, including a sharp knife or spade for dividing, gardening gloves, a watering can, and any additional tools you might need for soil preparation.
Labeling (Optional)
If you’re dividing multiple agapanthus varieties or want to keep track of the different plants, consider labeling the divisions with markers or tags. This helps prevent confusion and ensures you know which type is planted where.
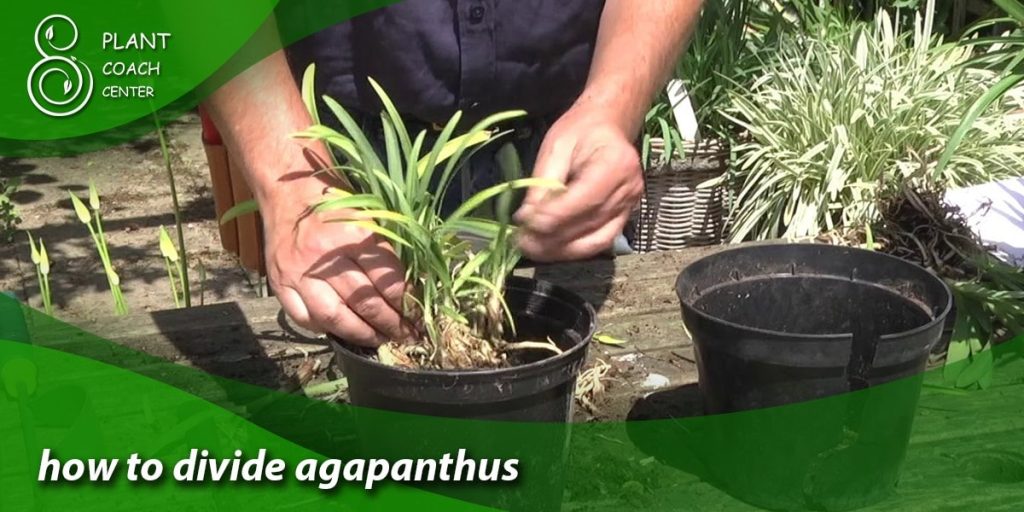
Step-by-Step Division Guide: From Clump to Individual Plants
Dividing agapanthus is a complex task. Still, it becomes a rewarding endeavor with a methodical approach and a touch of care. Follow these step-by-step instructions to successfully divide your agapanthus clumps into individual plants:
Step 1: Gather Your Tools and Materials
Before you begin, ensure you have all the necessary tools and materials. These typically include a sharp knife, a spade, gardening gloves, a watering can, and any labels you want to use for identification.
Step 2: Prepare the Clump
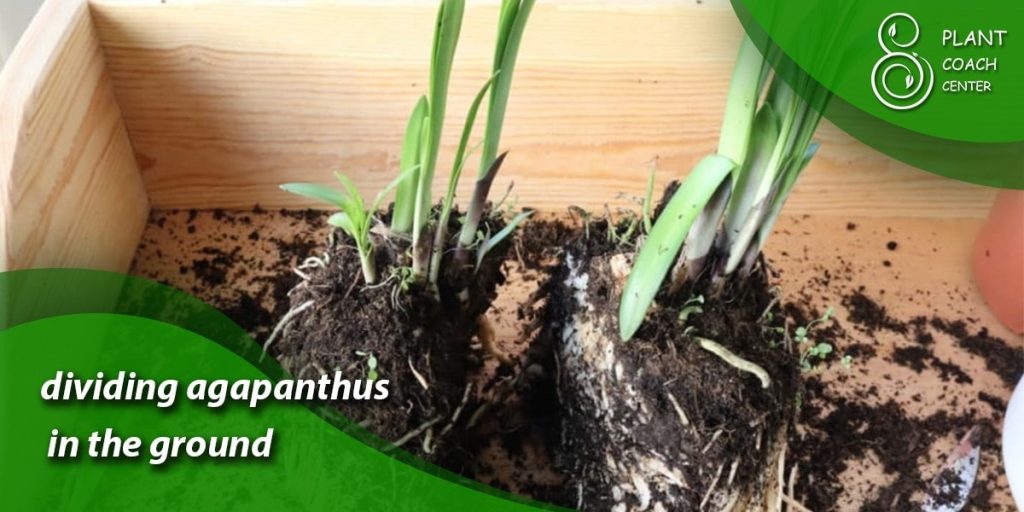
Carefully dig up the agapanthus clump you wish to divide. Use a spade to dig around the clump’s base, creating a circle encompassing the entire root system. Gently lift the clot out of the soil, shaking off excess dirt.
Step 3: Separate the Clump
Examine the clump and identify natural divisions where the plant can be separated. Natural gaps between the crowns or individual plants within the clump often indicate these divisions.
Step 4: Dividing the Clump
Carefully cut or pry apart the natural divisions using a sharp knife or spade. Each separated division should have roots and a portion of the rhizome (the thick underground stem). Ensure each division has healthy roots and at least one or two growing points.
Step 5: Trim Roots and Foliage
Trim any damaged or excessively long roots from each division. Also, trim the foliage to about half its original height. This reduces stress on the plant and directs its energy toward root growth.
Step 6: Planting the Divisions
If transplanting to new locations, dig holes in the new planting site, ensuring they are deep enough to accommodate the roots without bending them. Place the divisions in the holes, securing the crown at the same level as the soil surface.
Step 7: Fill and Water
Backfill the holes with soil, gently firming it around the roots as you go. Water the newly planted divisions thoroughly to settle the soil and eliminate air pockets.
Step 8: Mulch and Monitor
Apply a layer of mulch around the newly planted divisions to help retain moisture and suppress weeds. Keep an eye on the recently divided plants over the next few weeks, watering as needed and ensuring they adjust well to their new environment.
Root Health and Division Success: Ensuring Strong Growth Post-Division
Healthy roots are the foundation of thriving agapanthus plants, and safeguarding their root systems is paramount during the division process. Proper care of the roots during and after division sets the stage for successful growth and development. Here’s how to ensure root health and division success:
Gentle Handling
When dividing agapanthus, handle the roots with utmost care. Avoid excessive tugging, bending, or tearing, as these actions can damage delicate root structures. Gently separate the roots to minimize stress.
Trimming Damaged Roots
As you examine the roots, look for any damaged or rotting sections. Trim these areas with clean, sharp scissors or pruning shears to prevent the spread of disease or decay.
Promoting Healthy Growth
Prioritize divisions with robust and healthy root systems. Divisions with a good balance of roots and a few growing points will likely establish themselves quickly and flourish.
Root Hormone (Optional)
If you want to boost your divided agapanthus, consider using a rooting hormone. These products can encourage faster root growth and establishment, especially for divisions that might have experienced root damage during separation.
Planting Depth
When replanting the divisions, ensure that the crown (where the roots meet the foliage) is at the proper depth. Planting too deep or too shallow can hinder appropriate growth. The height should be level with the soil surface.
Watering Regimen
After planting, water the divisions thoroughly to settle the soil and provide hydration to the roots. Monitor the soil moisture in the following weeks and adjust your watering schedule based on the plant’s needs.
Mulching
Apply a layer of organic mulch around the base of the newly planted divisions. Mulch helps retain soil moisture, regulate temperature, and protect the roots from extreme conditions.
Avoid Fertilizing Immediately
Hold off on fertilizing the newly divided agapanthus immediately after planting. Allow the plants to establish their root systems before introducing additional nutrients.
Transplanting with Care: Ensuring a Smooth Transition
Transplanting the divided agapanthus into their new homes requires attention to detail and a thoughtful approach. Creating a welcoming environment for these freshly divided plants sets the stage for their successful establishment and growth. Here’s a guide to transplanting your agapanthus divisions with care:
Choose the Right Location
Before transplanting, select a suitable location that aligns with the agapanthus’ sunlight requirements and soil preferences. Ensure the soil is well-draining to prevent waterlogged roots.
Prepare the Soil
Dig a hole in the chosen location deep enough to accommodate the roots without bending or crowding them. Mix in some compost or well-rotted organic matter to enrich the soil and promote healthy root growth.
Spacing Consideration
Keep adequate spacing between each transplanted division. Agapanthus requires room for their foliage and roots to grow without competing for resources.
Gentle Removal
Gently lift the divisions from their temporary containers or the soil where they were divided. Handle them with the root ball, avoiding unnecessary disturbance to the delicate roots.
Planting Depth
Place each division in its prepared hole, ensuring the crown is at the same level as the soil surface. Planting too deep can lead to poor growth and reduced flowering.
Backfilling and Watering
Fill the hole with soil, gently firming it around the roots. Water the newly transplanted divisions immediately after planting. This helps settle the soil and eliminates air pockets around the bases.
Mulching
Apply a layer of organic mulch around the base of each transplanted division. Mulch aids in retaining soil moisture, moderating temperature fluctuations, and suppressing weed growth.
Regular Monitoring
Keep a close eye on the newly transplanted divisions over the coming weeks. Water as needed to ensure the soil remains consistently moist but not waterlogged.
Avoid Disturbance
During the initial stages of establishment, minimize disturbances around the transplants. Avoid heavy foot traffic or aggressive gardening practices that could disrupt the delicate roots.
Post-Division Care and Maintenance: Nurturing Your Newly Divided Plants
After the exhilarating process of division and transplantation, your role as a caregiver continues to ensure the long-term health and beauty of your agapanthus. Post-division care and maintenance are pivotal in helping these plants establish themselves and flourish in their new environment. Here’s a comprehensive guide to caring for your newly divided agapanthus:
Watering Routine
For the first few weeks after division, monitor soil moisture closely. Keep the soil consistently moist but not waterlogged. As the plants establish their roots, they gradually transition to a regular watering routine that suits their needs.
Fertilization Strategy
Hold off on fertilizing immediately after division. Wait until you notice new growth emerging. When fertilizing, opt for a balanced, slow-release fertilizer to provide the necessary nutrients over an extended period.
Mulch Maintenance
Maintain a layer of mulch around the base of the plants. This helps retain moisture, regulate soil temperature, and inhibit weed growth. Refresh the mulch as needed to maintain its effectiveness.
Protection from Extremes
Shield the newly divided agapanthus from extreme weather conditions. If frost is a concern, consider covering the plants with a frost cloth during cold nights. Similarly, provide shade during scorching days if needed.
Deadheading
As the agapanthus blooms, consider deadheading spent flowers to encourage continuous blooming and maintain a tidy appearance.
Pest and Disease Vigilance
Regularly inspect your agapanthus for signs of pests or diseases. Catching and addressing issues early can prevent them from spreading and damaging the plants.
Supportive Staking (if needed)
Depending on the variety and growth habit, some agapanthus may benefit from supportive staking. This prevents top-heavy plants from flopping over and ensures an upright growth form.
Long-Term Planning
As your newly divided agapanthus settles into their new locations, consider their long-term placement in your garden. Consider their growth habits, eventual size, and compatibility with nearby plants.
Division Renewal
Remember that agapanthus benefits from division every few years to prevent overcrowding and maintain vigor. Regularly assess the need for division and plan accordingly.
Conclusion
In the delicate art of agapanthus division, we’ve explored the intricacies of recognizing the signs of congestion, mastering the timing for success, and executing the division process with finesse. By prioritizing root health, carefully transplanting, and tending to post-division care, we pave the way for these botanical wonders to flourish in their new homes.
As your agapanthus evolves and rejuvenates, remember that this journey is a testament to your dedication as a gardener. Whether you’re a seasoned horticulturalist seeking to refine your techniques or an enthusiastic beginner eager to learn, the guidance provided here on PlantCouchCenter.com equips you to embark on a transformational journey with these elegant blooms.
As you watch your garden come alive with the splendor of divided agapanthus, take pride knowing that you’ve nurtured nature’s beauty while nurturing your gardening prowess.
When is the best time to divide Agapanthus?
Late winter to early spring or after flowering in late spring to early summer.
How do I ensure root health during division?
Handle roots gently, trim damaged parts, and plant at the proper depth.
What's the post-division care routine?
Monitor watering, apply mulch, protect from extremes, and maintain regular care and monitoring.