When to Divide Bearded Iris?
Welcome to the enchanting world of bearded irises, where nature’s palette comes alive in stunning hues and intricate designs. These graceful blooms, reminiscent of brushstrokes on a canvas, grace gardens with elegance and allure. Yet, behind their mesmerizing beauty lies a secret to maintaining their splendor: timely division. Imagine a symphony of colors that intensifies year after year, a spectacle that genuinely embodies the magic of gardening.
This guide delves into the art of knowing “When to Divide Bearded Iris.” Like an artist pauses to choose the perfect moment to stroke the canvas, gardeners must recognize the opportune time to divide and conquer. Join us as we uncover the rhythm of the iris’s growth cycle, decipher the signs of overcrowding, and equip you with the wisdom to nurture your garden’s masterpieces.
Whether you’re a seasoned horticulturist or just beginning to explore the realm of gardening, the journey to mastering iris division promises thriving flowers and a deeper connection to the ever-unfolding tapestry of nature.
Seasonal Signals: Exploring the Best Time of Year
Unveiling the Iris Growth Cycle: When Dividing is Natural
Bearded irises, those magnificent garden jewels, follow a rhythmic dance of growth and dormancy throughout the year. To master the art of dividing these captivating plants, it’s essential to grasp the nuances of their growth cycle. Spring and fall emerge as the key seasons when these botanical wonders signal their readiness for division.
Spring Awakening
As the world awakens from its winter slumber, so do bearded irises. In the first tender, shoots emerge from the soil; it’s in early springs, a telltale sign that the time for division draws near. The energy stored in the rhizomes fuels this vigorous growth, making it an optimal period to separate and transplant them. The post-winter burst of activity provides ample time for the newly divided rhizomes to establish themselves before the scorching summer heat arrives.
Fall Transition
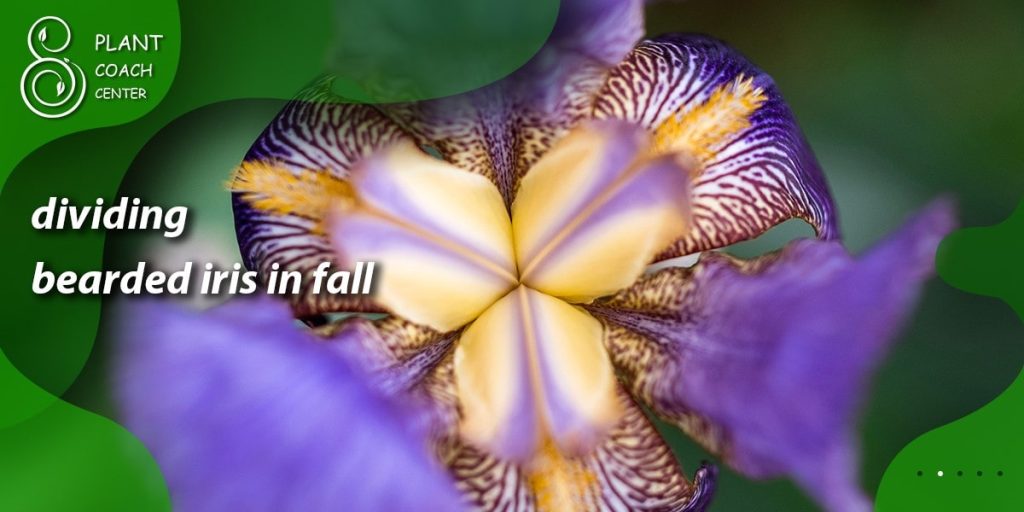
Another opportune moment for iris division arises in late summer to early fall, just after the plant’s blooming season ends. During this time, the irises have experienced the zenith of their growth cycle, and the fading foliage indicates that the rhizomes are transitioning into a period of dormancy.
Dividing irises at this point allows them to settle into their new homes while temperatures are milder and the soil retains warmth from the departing summer. This timing gives the divisions ample time to develop robust root systems before the chilling grasp of winter sets in.
The Wisdom of Timing
Understanding the bearded iris’s natural growth cycle is akin to knowing the rhythm of a cherished song. Just as musicians strike the right chords to create harmonious melodies, gardeners can strike the perfect balance between timing and division to ensure a pleasant, thriving garden. Whether it’s the vibrant rebirth of spring or the contemplative transition of fall, these are the windows of opportunity when bearded irises welcome the chance to shine anew.
Vital Signs of Overcrowding: Recognizing the Need to Divide
Signs of Distress: Clues that Your Bearded Iris Yearns for Space
Amidst the splendor of a blooming garden, it’s easy to overlook the subtle signals that indicate your bearded irises are feeling a bit cramped in their current quarters. Like any living organism, these botanical marvels exhibit telltale signs of distress when their space becomes limited. By learning to read these signs, you can become a caretaker attuned to their needs, ensuring a flourishing garden year after year.
Dwindling Blooms
The most conspicuous indication that your bearded irises crave more space is a decline in their blooming performance. Consider considering division if you’ve noticed a reduction in the number of blooms or the vibrancy of their colors. Crowded rhizomes compete for nutrients, sunlight, and water, leading to diminished flower production and lackluster blooms.
Stunted Growth
Take a closer look at the foliage of your irises. Are the leaves smaller than usual? Do they appear pale or weak? These are clear indicators of overcrowding. With limited resource access, irises cannot develop to their full potential. Dividing them offers each rhizome the chance to stretch its roots, soak up nutrients, and achieve the robust growth characteristic of healthy irises.
Center Dieback
A sure sign that your irises are facing an accommodation crisis is the presence of dieback at the center of the clump. As rhizomes multiply and press against each other, the center of the plant becomes an inhospitable zone, resulting in decaying foliage. This is a wake-up call to intervene promptly and give your irises the space they need to thrive.
Escape Routes
BeardDespiter graceful appearance is bearded irises killed at sending out exploratory shoots in their quest for more room. If you’ve noticed rhizomes escaping the confines of the planting area, inching their way onto pathways or neighboring beds, it’s a clear indication that they’re seeking an escape from overcrowding. Acknowledge their plea and consider division as a rescue mission.
Listening to Nature’s Whispers
Successful gardening involves keen observation and a willingness to respond to nature’s whispers by two-step in as a savior of your bearded irises. Attuning yourself to the vital signs of an overcrowding mission becomes more than just a horticultural task; it transforms into a nurturing gesture, allowing your garden’s stars to shine brightly again.
Pre-Division Preparations: Setting the Stage for Success
Tools of the Trade: Gathering Essentials for a Smooth Division
Embarking on the journey of dividing your bearded irises requires more than just a green thumb; it demands a well-equipped arsenal of tools and knowledge. Just as an artist carefully selects their brushes and paints before starting a masterpiece, a gardener should gather the necessary tools to ensure a seamless and successful division process. These tools make other tasks more accessible and contribute to your irises’ well-being as they transition to new homes.
Gloves and Attire
Before you even consider reaching for your garden tools, don sturdy gloves. Not only will they protect your hands from soil and potential irritants, but they’ll also prevent damage to the fragile rhizomes. Wear comfortable attire that you don’t mind getting a bit dirty; gardening is a hands-on affair, after all.
Sharp Knife or Garden Spade
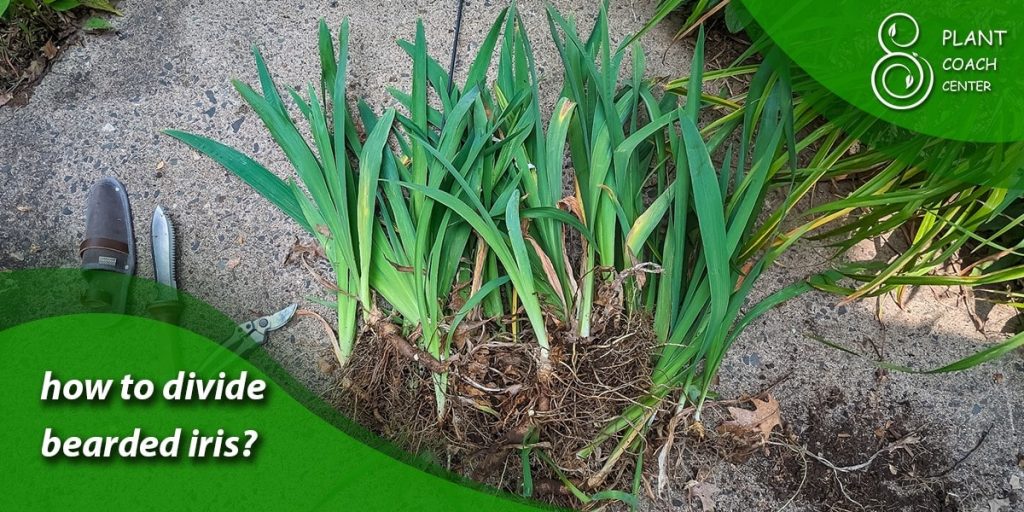
A sharp, clean knife or a garden spade is your primary tool for dividing bearded irises. With this tool, you can cut through the rhizomes cleanly, minimizing damage and allowing for healthier divisions. Ensure your cutting tool is disinfected to prevent the spread of diseases.
Pruning Shears
Pruning shears are invaluable for trimming back the iris foliage. Removing excess leaves before division reduces plant stress and makes them easier to handle. It also helps prevent water loss through transpiration, giving the divided irises a better chance to establish themselves.
Trowel or Shovel
A trowel or shovel is essential for digging up the clumps of irises from the soil. Choose a tool that suits the size of your irises and the depth at which they are planted. Carefully lift the cluster to avoid damaging the rhizomes during extraction.
Bucket or Container
A bucket or container nearby to hold the divided rhizomes temporarily can streamline the division process. This prevents the delicate rhizomes from drying out while you work, ensuring they remain in optimal condition for replanting.
Labels and Marker
Keep track of the different iris varieties by labeling the divisions with their names. A waterproof marker or label that can withstand outdoor conditions will help you remember the unique qualities of each iris and where they’re planted.
Soil Amendments
Preparing the planting area with soil amendments like compost and well-rotted manure is crucial for providing the newly divided irises with a nutrient-rich environment. Amended soil promotes healthy root development and robust growth in the coming seasons.
Anticipating Success
Just as a painter envisions the final strokes of their artwork, a gardener envisions the vibrant blooms that will flourish due to their efforts. Armed with the right tools, you’re not merely dividing irises but laying the groundwork for a blooming masterpiece that will enchant your garden for years.
Step-by-Step Division Guide: Navigating the Process with Finesse
Gentle Extraction: Safely Removing Iris Clumps from the Ground
Diving into the world of iris division may seem daunting, but with a step-by-step approach, it becomes a satisfying endeavor that nurtures your garden and gardening skills. As you prepare to divide your bearded irises, follow these guidelines to ensure a smooth and successful transition for these graceful plants.
Step 1: Choose the Right Time
Before you wield your garden tools, ensure you’ve picked the optimal time for division. Spring and fall are the prime seasons, with spring being the ideal time for warmer regions and fall for cooler ones. The plant’s energy is concentrated in the rhizomes during these periods, allowing for a higher chance of successful transplantation.
Step 2: Prepare the New Site
Identify and prepare the new planting spots while irises are still in the ground, ensure the chosen locations receive adequate sunlight, and have well-draining soil. Amend the soil with compost or other organic matter to provide the newly divided irises with a fertile environment.
Step 3: Cut Back the Foliage
Trim the leaves of the iris clump to around six inches in length. This reduces water loss through transpiration and lessens the stress on the plant during the division process.
Step 4: Gently Lift the Clump
Using a sharp knife or a garden spade, carefully dig around the perimeter of the clump, loosening the soil. Insert the tool beneath the cluster and gently lift it from the ground. Shake off excess earth to reveal the rhizomes.
Step 5: Inspect and Separate Rhizomes
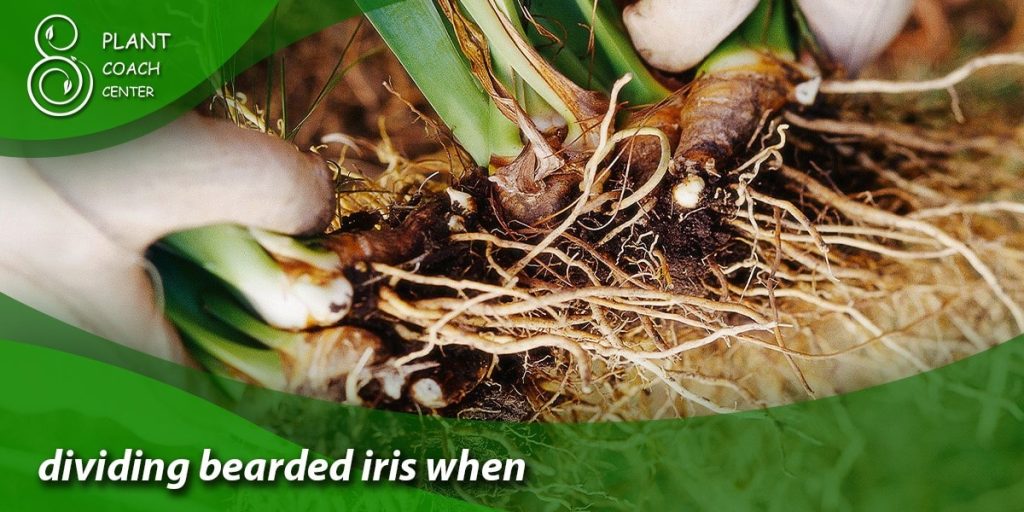
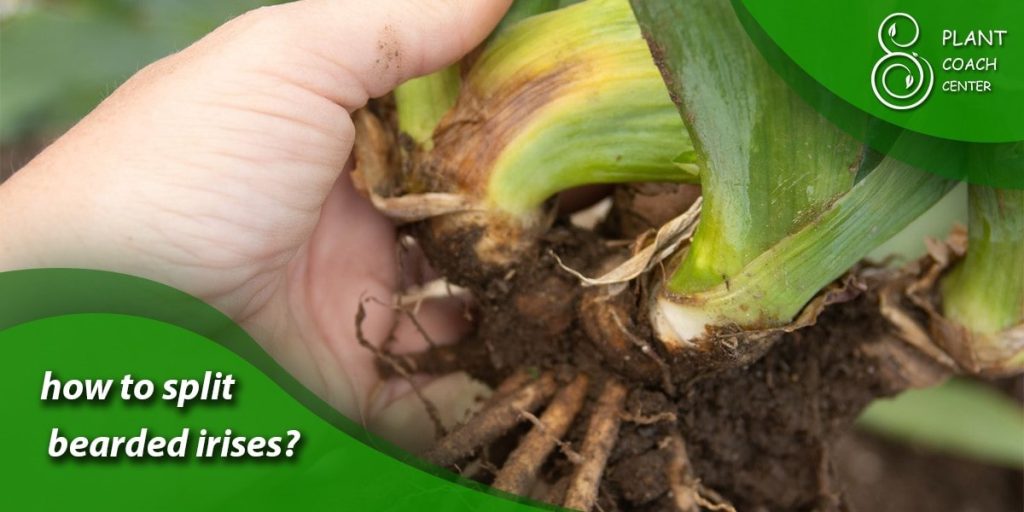
Examine the clump for healthy, plump rhizomes. Discard any diseased or damaged ones. Use your hands or a clean tool to gently separate the rhizomes, ensuring each division has at least one fan of leaves and healthy roots.
Step 6: Trim and Treat
Before replanting, trim any damaged or dead roots from the rhizomes. If there are any signs of pests or diseases, treat the rhizomes with an appropriate solution to prevent further issues.
Step 7: Replant the Divisions
Place the divisions into their new planting holes, ensuring that the tops of the rhizomes are level with the soil surface. Space the divisions adequately to allow for future growth. Gently press the soil around each division to secure it in place.
Step 8: Water and Mulch
Give your newly divided irises a good drink of water to help settle the soil and reduce transplant shock. Apply a layer of mulch around the plants to conserve moisture, regulate soil temperature, and suppress weed growth.
Step 9: Monitor and Nurture
Keep a watchful eye on your divided irises in the weeks following transplantation. Regular watering and maintenance will help them establish their roots in their new homes. Once they’re well-established, you can resume your normal iris care routine.
A Labor of Love
The process of dividing bearded irises embodies the art of patience and precision. With each step, you’re not nurturing the plants and cultivating your gardening skills. As you guide your irises through this transformation, you become a steward of nature’s beauty, ensuring your garden continues flourishing in all its resplendent glory.
Rejuvenating and Replanting: Reviving Divided Iris Clumps
Trimming and Treating: Giving Each Rhizome a Fresh Start
The division process is not just a separation of plants; it’s an act of rejuvenation, a chance for your bearded irises to embark on a new chapter of growth and vitality. With the divisions extracted and prepared, the next step is to carefully replant them, providing them with the care and attention they need to thrive in their new surroundings.
Trimming for Success
BeforGive them a little extra care before reintroducing the divided irises to the earth, and give back any remaining foliage to a length of about six inches. This seemingly simple step is instrumental in reducing the stress on the plant. With fewer leaves to support, the rhizome can focus its energy on root development and acclimating to its new home.
Treating for Resilience
Just like a traveler prepares for a journey, so should you design the rhizomes for their relocation. Inspect each division for any signs of disease or pests. If you spot any issues, address them before replanting. Treating the divisions now prevents potential problems from spreading to the entire garden. A diligent gardener is a guardian of the garden’s health, and attention to detail can make all the difference.
Choosing a New Spot
As you select the planting spots for your divided irises, consider the unique requirements of each variety. Match their sunlight preferences, soil type, and drainage needs to the characteristics of the new location. Spacing is essential; giving each iris enough room to grow ensures optimal air circulation and reduces disease risk.
Planting with Precision
Gently nestle each division into its new home, ensuring the rhizome sits at the soil surface. The fan of leaves should face outward, allowing new growth to emerge. Cover the rhizome with soil and lightly pat it down to eliminate air pockets.
Watering with Care
After planting, water the divisions thoroughly to encourage root establishment. A good soak helps settle the soil around the rhizomes and provides them with the moisture they need to start growing. Remember that newly divided irises are more sensitive to moisture levels, so ensure the soil remains consistently damp but not waterlogged.
Mulching for Protection
Apply a layer of mulch around the newly planted irises. Mulch helps maintain soil moisture, prevents weed growth, and regulates soil temperature. It also offers protection during the critical period when the divisions adjust to their new environment.
Nurturing New Beginnings
As you stand back and admire your handiwork, envision the transformed landscape that will soon grace your garden. The process of dividing, trimming, and replanting bearded irises is not just about fostering the growth of flowers; it’s about cultivating a connection to the cycles of nature and witnessing the resilience of life. With each well-tended division, you’re nurturing, not other irises, and journey as a gardener.
Post-Division Care: Nurturing Divided Irises to Flourish
Water Wisely: Hydration Tips for Newly Transplanted Irises
As the freshly divided irises settle into their new homes, your role as a nurturing caretaker continues. Just as a parent watches over a growing child, your attention to post-division care is pivotal in ensuring the success of your garden’s newest inhabitants. The key focus during this phase is to provide the right amount of water, allowing the irises to establish solid roots and embark on a journey of flourishing beauty.
Watering Basics
Immediately after transplanting, water the divided irises thoroughly. This initial watering helps settle the soil around the rhizomes and reduces the risk of air pockets, which can hinder root development. However, it’s crucial not to overwater, as waterlogged soil can lead to rot.
Monitor Moisture Levels
Keep a vigilant eye on the moisture levels in the soil over the following weeks. Newly divided irises are more sensitive to shifts in moisture than established plants. Check the soil’s moisture by sticking your finger about an inch into the ground. If it feels dry at this depth, it’s time to water.
Deep and Infrequent Watering
Rather than frequent shallow watering, aim for deep, infrequent watering sessions. A thorough soaking encourages the roots to grow deeper into the soil for water. This promotes more robust root systems that can withstand dry spells and support healthier plant growth.
Morning Watering
Water your divided irises in the morning. Morning watering allows the leaves and soil to dry during the day, reducing the risk of fungal diseases that thrive in moist conditions. Additionally, it ensures that the plants have sufficient moisture to withstand the day’s heat.
Mulch Maintenance
The layer of mulch you applied after replanting not only conserves moisture but also acts as a barrier against evaporation. As you water, ensure the mulch layer remains intact and replenish it as needed. This practice maintains a stable moisture environment around the rhizomes.
Adjusting to New Conditions
Understand that it takes time for the divided irises to adjust to their new surroundings. During this acclimation period, their water needs might be slightly different than established plants. Consistently monitoring the soil’s moisture levels and adapting your watering routine will help the irises develop strong roots.
A Rewarding Journey
Post-division care continues your partnership with nature, a dance between your attentive nurturing and the irises’ innate will to thrive. As the weeks pass, you’ll witness the new leaves’ growth, sturdy shoots’ emergence, and the promise of future blooms. Your dedication to providing proper hydration paves the way for a stunning garden display that testifies to the beauty of the collaboration between gardener and plant.
Future Blooms and Beauty: Anticipating Results of Your Efforts
Growth Expectations: What to Anticipate in the Coming Seasons
As you marvel at your newly divided and carefully nurtured bearded irises, it’s only natural to wonder about the future. The process of division and the attentive care you’ve provided are investments in a garden that will continue to evolve, bringing forth a tapestry of colors, textures, and fragrances. Let’s explore the journey ahead, from the first signs of growth to the eventual grand spectacle of blooms.
Season of Adjustment
In the immediate aftermath of division, the irises are focused on acclimating to their new homes. Their energy is directed toward root establishment and absorbing nutrients from the surrounding soil. During this period, you might notice minimal above-ground growth as the plants allocate resources to laying solid foundations below.
Emergence of Leaves
As the irises settle in, you’ll observe new leaves emerging from the fans. These leaves may appear slightly smaller than those on established plants, but don’t be discouraged—this is part of the adjustment process. The foliage will gradually become more robust and vibrant as the rhizomes develop.
Year One Blooms
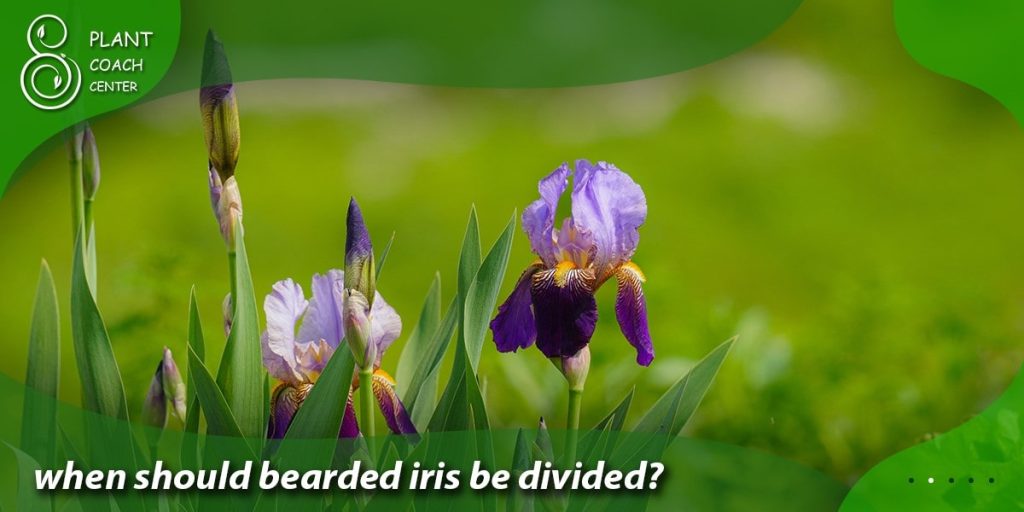
In the first year after division, it’s common for bearded irises to produce fewer blooms than usual. Their energy is primarily channeled into root development and adapting to their new environment. While the flower count might be lower, the colors themselves will still exude the captivating charm and splendor that bearded irises are known for.
Subsequent Seasons
As the divided irises grow and mature, their blooming performance will progressively improve. By the second and third years post-division, you can expect a return to the full glory of blooms. The rhizomes will have established robust root systems, allowing the plants to channel their energy into producing abundant and vibrant flowers.
A Symphony of Colors
One of the most enchanting aspects of bearded irises is the diverse array of colors and patterns they offer. Each passing season, your garden will become a living canvas painted with many hues. From the soft pastels of spring to the rich and bold tones of summer, the irises will contribute to a stunning display that evolves and shifts with the changing seasons.
The Fruits of Patience
Just as a painter patiently layers colors to create depth and complexity, your dedication to your divided irises will yield a garden of multidimensional beauty. The process of division and the care you’ve provided are investments in a future full of anticipation, surprises, and a visual feast for the senses. So, watch with anticipation as your garden transforms into a living masterpiece, a testament to the power of nurturing and the wonders of nature.
Conclusion
In the intricate gardening world, where every act is a stroke on nature’s canvas, the journey of dividing bearded irises unveils not just a horticultural task but a testament to the artistry of nurturing and the resilience of life. As we’ve explored the rhythm of their growth, the signs of overcrowding, and the meticulous division steps, we’ve embarked on a shared endeavor with these captivating blooms.
Guided by patience and attuned to nature’s cues, we’ve nurtured each division into a promising future, where their roots dig deep, and their petals unfurl in resplendent beauty. The promise of vibrant blooms and renewed vigor awaits, a reward for the meticulous care bestowed upon them.
As you watch your garden’s transformation unfold, remember that division is more than a botanical task—a dance with the ever-evolving symphony of life. For more insights on gardening wonders, visit plantcouchcenter.com and continue your exploration of the natural world’s marvels.
When should I divide bearded irises?
Spring or fall, depending on your region's climate, is ideal for dividing bearded irises.
How do I know if my irises need dividing?
Watch for reduced blooms, stunted growth, and center dieback, indicating overcrowding and division needs.
What tools do I need for the iris division?
Gather gloves, a sharp knife, pruning shears, trowels, labels, and soil amendments for successful division.


