
When to Divide Daylilies?
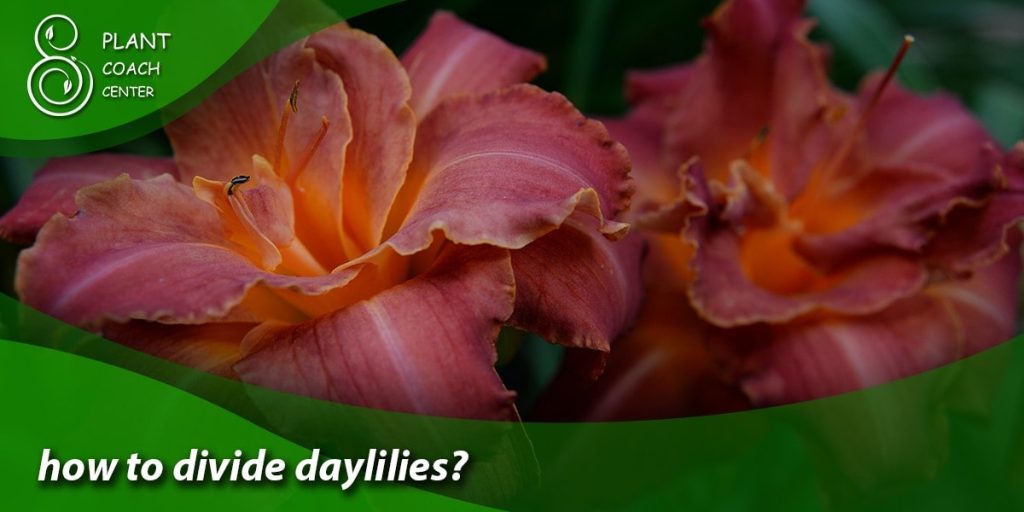
Welcome to the vibrant world of daylilies, where bursts of color and elegance grace our gardens. These resilient and captivating perennials have earned a special place in the hearts of garden enthusiasts. Yet, as with any flourishing life, there comes a time when growth calls for a little extra space to breathe.
This is where the art of division enters the stage. Imagine orchestrating a horticultural symphony, carefully separating the intricately woven roots, and giving rise to new beginnings. The process of dividing daylilies ensures the continued vitality of these botanical gems and offers a chance for gardeners to connect with the essence of growth and renewal.
In this verdant exploration, we embark on a journey through the seasons, unearthing the secrets of when and how to divide these beauties. Whether you’re a seasoned horticulturist or nurturing your first green venture, join us as we delve into the art, science, and rewards of mastering the art of dividing daylilies.
Seasonal Signals for Division
Understanding the rhythms of nature is critical to successful daily division. As these resilient plants cycle through their seasons, they offer subtle signals that indicate the ideal times for division. Spring and fall stand out as the prime seasons for this horticultural endeavor.
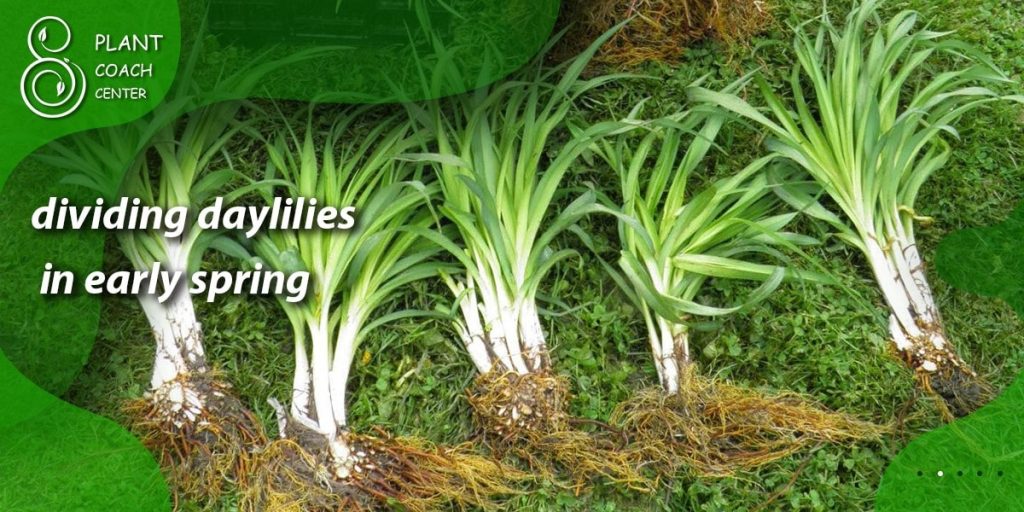
Spring Splendor
As the world awakens from winter’s slumber, daylilies begin to sprout new shoots, signaling the start of their growing season. Early spring, just as the soil becomes workable, is an opportune time to divide. Watch for signs such as the emergence of fresh green growth and the swelling of new buds. Dividing in early spring allows the newly separated plants ample time to establish their roots before the heat of summer arrives.
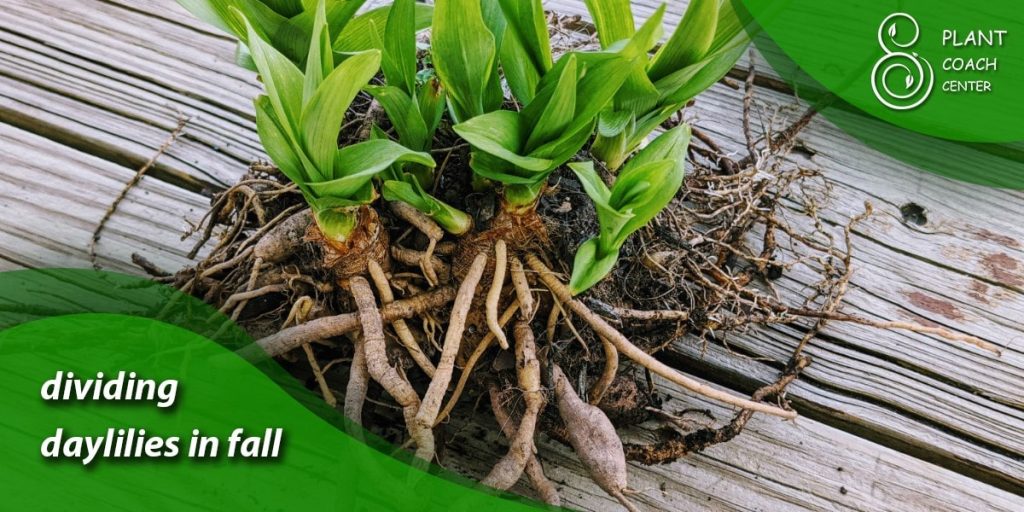
Autumn Transitions
The months of late summer to early fall herald another division window. After the blooming peak, daylilies shift from producing flowers to building up energy reserves in their roots. This period of dormancy preparation is an excellent opportunity to divide and transplant. Typically, the temperature has cooled down by this point, reducing stress on the plants as they adapt to their new locations.
While spring and fall are the primary division seasons, it’s essential to consider regional variations and weather conditions. Early winter might also be suitable in milder climates, while in areas with harsher winters, it’s wise to stick to the traditional spring and fall divisions. By aligning your division efforts with the natural cues of the daylilies, you set the stage for a successful transition that ensures their continued vitality and blooming splendor.
Recognizing Division-Ready Plants
Like a skilled conductor reading the nuances of a musical score, gardeners can discern the signals that daylilies send when they’re ready for division. Understanding these visual cues can help you maximize your division efforts.
Overcrowding Signals
One of the most apparent signs that daylilies are due for division is overcrowding. When a once-vibrant clump starts to exhibit a dense and congested appearance, with reduced foliage and fewer blooms, it’s time to consider dividing. Overcrowding limits the plant’s growth potential and leads to decreased air circulation and increased susceptibility to diseases.
Decreased Blooming
Daylilies are known for their prolific blooms, so if you notice a significant decline in the number of flowers your plants produce, it’s a strong indicator that division is needed. As daylilies become overcrowded, their energy is diverted from flowering to sustaining the crowded root system. Dividing the plants will rejuvenate their vigor and encourage more abundant blooming in the coming seasons.
Stunted Growth and Vigor
When daylilies have exhausted their available space, their overall growth and vigor seem stunted. New shoots might struggle to emerge from the crowded center, making an uneven appearance. Dividing the plants and providing ample space to spread their roots will promote healthy growth and a revitalized appearance.
Faded Center Foliage
Examine the foliage at the center of the daily clump. If you notice that the leaves have started to fade or become yellow, it’s a sign that the plant’s resources are becoming depleted. Dividing the daylilies and replanting them in enriched soil will provide the fresh nutrients they need to thrive.
Tools and Techniques
Dividing daylilies is a delicate process that requires the right tools and techniques to ensure the health of the plants. Here’s a guide to the essential tools and steps you’ll need to follow:
Necessary Tools
Garden Fork: A sturdy garden fork is your primary tool for gently loosening the soil around the daily clump. This helps expose the root system and makes lifting the plant out of the ground easier.
Pruning Shears or Knife: You’ll need a sharp pair of pruning shears or a clean knife to divide the daylily clump into smaller sections. Make sure your cutting tool is disinfected to prevent the spread of diseases.
Bucket of Water: Have a bucket of water on hand to temporarily immerse the divided clumps. This helps prevent the roots from drying out during the division process.
Potting Mix and Containers: Prepare pots with a well-draining potting mix for the divided daylilies. This will give them the necessary nutrients and support to establish new roots.
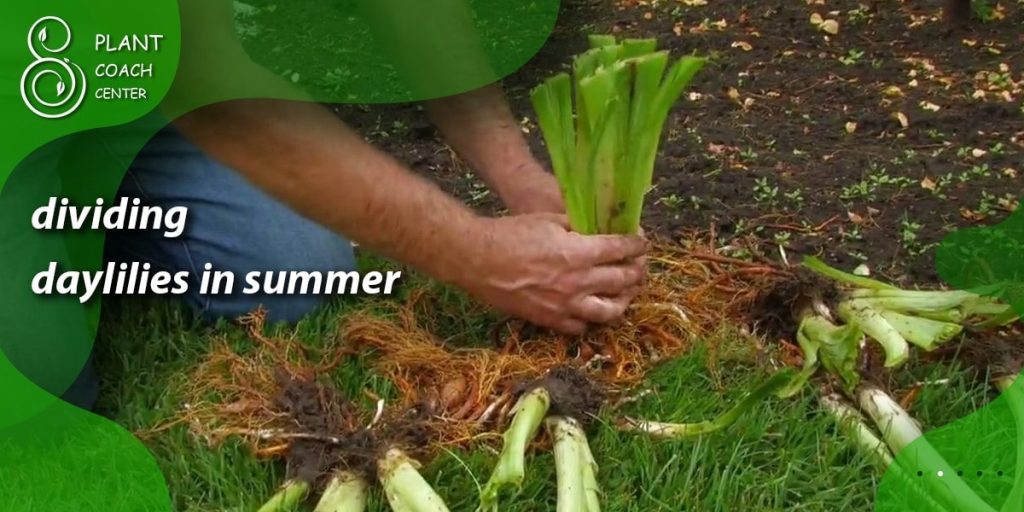
Step-by-Step Division
Preparation: To ensure the soil is slightly moist, begin by watering the daylilies a day or two before division. This makes it easier to dig up the clump.
Loosening the Soil: Gently insert the garden fork into the soil around the daily clump and gently pry it up. Work your way around the clump to loosen the soil from all sides.
Lifting the Clump: Once the soil is loosened, carefully lift the clump out of the ground, taking care not to damage the roots.
Separation: Examine the clump and identify natural divisions or growth points. Use the pruning shears or knife to divide the clump into smaller sections, ensuring each section has healthy roots and foliage.
Trimming and Pruning: Trim any damaged or overly long roots and prune the foliage to reduce stress on the plant. Aim to retain a balanced ratio of roots to foliage.
Temporary Immersion: Place the divided clumps into the bucket of water to prevent the roots from drying out while you work on the rest of the clumps.
Potting: Plant each divided section in a prepared container with potting mix. Position the crown (where the foliage emerges) at the soil surface, and gently pat down the soil around the roots.
Post-Transplant Care: Water the newly potted daylilies thoroughly and place them in a shaded area for a few days to help them acclimate to their new environment.
Preparing the Division Site
The success of your divided daily lives largely depends on the environment they’re transplanted into. Preparing the division site properly sets the stage for their healthy growth and continued vibrancy.
Selecting the Ideal Location
Choose a location that receives the appropriate amount of sunlight for daylilies. These plants generally thrive in full sun to light shade. Ensure the soil in the chosen area is well-draining to prevent waterlogged roots, which can lead to rot.
Soil Preparation
Amend the soil in the chosen area with organic matter such as compost or well-rotted manure. This enriches the soil’s nutrients and improves its structure, providing a welcoming environment for the transplanted daylilies to establish their roots.
Spacing Considerations
Give each divided daylily section enough space to grow and spread without overcrowding. Adequate spacing promotes healthy growth and allows for proper air circulation, reducing the risk of diseases.
Planting Depth
When planting the divided sections, make sure to position them at the same depth they were previously growing. The crown (where the foliage emerges) should be level with the soil surface. Planting too deep or too shallow can stress the plants.
Watering Routine
Water the newly transplanted daylilies thoroughly after planting to settle the soil and eliminate air pockets around the roots. Keep the soil consistently moist, but not soggy, during the initial weeks after transplanting to help the roots establish.
Mulching Magic
Apply a layer of organic mulch around the base of the transplanted daylilies. Mulch helps retain soil moisture, suppresses weeds, and maintains a more even soil temperature.
Protection Measures
If you’re transplanting daylilies in the hotter months, consider providing temporary shading to prevent stress on the plants as they adjust to their new location. Using shade cloth or placing the plants under taller companion plants can offer protection.
Step-by-Step Division Guide
Embarking on the journey of dividing daylilies requires a methodical approach to ensure the health and vitality of these beloved plants. Let’s break down the process into clear steps:
Step 1: Pre-Division Prep
Water the daylilies a day or two before division. Moist soil makes it easier to dig up the clump without damaging the delicate roots.
Step 2: Loosening the Soil
Gently insert a garden fork into the soil around the daily clump. Work your way around the clump, loosening the soil from all sides. This step helps expose the root system and makes lifting the clump easier.
Step 3: Lifting the Clump
Carefully lift the clump from the ground once the soil is sufficiently loosened. Hold the base of the foliage gently to avoid damaging the leaves.
Step 4: Separating Clumps
Examine the clump for natural divisions or growth points. Use sharp pruning shears or a clean knife to separate the clump into smaller sections. Each section should have healthy roots and foliage.
Step 5: Trimming and Pruning
Trim any damaged or excessively long roots using sterilized pruners. Trim the foliage as well, reducing its length by about a third. This minimizes stress on the plant during the transition.
Step 6: Temporary Immersion
Place the divided clumps into a bucket of water to prevent the roots from drying out while you work on the remaining clumps. This step is crucial to keep the roots hydrated.
Step 7: Potting Preparation
Prepare pots with a well-draining potting mix. The pots should be large enough to accommodate the root systems of the divided clumps.
Step 8: Planting in Pots
Plant each divided section in a prepared pot, positioning the crown at the soil surface. Gently fill the soil around the roots, ensuring they are adequately covered.
Step 9: Post-Transplant Care
Water the potted daylilies thoroughly to settle the soil around the roots. Place the pots in a shaded area for a few days to help the plants acclimate to their new environment.
Step 10: Transplanting to the Garden
Once the transplants have acclimated to their pots, carefully choose the planting location in your garden. Follow the “Preparing the Division Site” guidelines for soil preparation, spacing, and planting depth.
Post-Division Care
The journey of dividing daily lives continues after the separation process. To ensure the successful transition and continued thriving of your plants, providing them with the proper post-division care is essential.
Watering Wisdom
After transplanting the divided daylilies, water them generously to settle the soil and encourage root establishment. Keep the soil consistently moist during the first few weeks, but avoid waterlogging, as overly wet conditions can lead to root rot.
Fertilization Strategy
While it’s important not to overwhelm the newly transplanted daylilies with excessive nutrients, applying a balanced, diluted liquid fertilizer can give them a gentle boost. Choose a fertilizer with a balanced N-P-K ratio (nitrogen, phosphorus, and potassium) and follow the manufacturer’s instructions for application.
Mulching Magic
Applying a layer of organic mulch around the base of the transplanted daylilies serves multiple purposes. It helps retain soil moisture, suppresses weed growth, and regulates soil temperature. Keep the mulch a few inches from the plant’s crown to prevent rot.
Monitoring and Adjusting
Regularly monitor the transplanted daylilies for signs of stress or any issues. Adjust your watering routine based on weather conditions and the plant’s moisture needs. If you notice any yellowing leaves or slow growth, consider providing a gentle foliar feed with a water-soluble fertilizer.
Pest and Disease Vigilance
Watch for pests and diseases that might target the weakened transplants. Early detection is critical to preventing any potential outbreaks. Regularly inspect the foliage for any signs of damage or unusual symptoms.
Patience and Observance
Transplanted daylilies require some time to acclimate to their new environment. Be patient and observe their progress closely. You’ll notice new growth and improved vigor as they settle in and establish their roots.
Seasonal Adjustments
As the seasons change, your care routine might need adjustments. To protect the transplants from excessive heat stress, consider providing temporary shading during the hot summer. Protect them from harsh frost or extreme cold in colder months by providing a layer of mulch or frost cloth.
Benefits of Division
Dividing daylilies isn’t just a horticultural task; it’s a practice that bestows a range of benefits upon both the plants and the garden. Let’s delve into the rewards that come from mastering the art of division:
Rejuvenated Growth
One of the primary advantages of dividing daylilies is the rejuvenation of growth. Over time, the original clumps can become overcrowded, reducing blooming and stunted growth. Dividing the plants allows them to access fresh soil and nutrients, igniting new growth and vitality.
Increased Flower Production
Daylilies are renowned for their stunning blossoms, and division can significantly enhance their flowering performance. With more space for their roots to spread and access nutrients, the newly divided plants are poised to produce abundant blooms, transforming your garden into a riot of color.
Propagation Possibilities
The division offers the opportunity to propagate your daylilies, create new plants to expand your garden, or share with fellow gardening enthusiasts. As you carefully separate and replant the clumps, you’re essentially creating offspring of your existing plants, ensuring their legacy lives on.
Healthier Root Systems
Over time, the center of daily clumps can become compacted and root-bound, hindering the plants’ overall health. Dividing allows you to address this issue by freeing the roots from their tangled state and encouraging healthier, more robust root systems that can better absorb water and nutrients.
Disease Prevention and Control
By dividing daylilies, you can proactively address potential disease issues. Overcrowded conditions can create a breeding ground for pests and diseases. Through division, you’re reducing the risk of infestations and providing better air circulation, which helps prevent fungal problems.
Aesthetic Enhancements
A well-kept garden is a canvas of beauty, and dividing daylilies contributes to its aesthetic appeal. Neatly spaced, vibrant plants showcase their colors and forms more effectively, transforming your garden into a captivating display that’s sure to catch the eye of passersby.
Sharing the Joy
One of the most heartwarming benefits of division is the ability to share the joy of gardening with others. The new plants you create can be gifted to friends, family, or fellow gardeners, allowing them to enjoy the beauty and resilience of daylilies in their own spaces.
Conclusion
In the intricate tapestry of gardening, the art of dividing daylilies emerges as a transformative act, weaving together the threads of rejuvenation, propagation, and beauty. As we’ve explored the seasons, signals, tools, techniques, and care required, it becomes evident that this practice is more than just a horticultural endeavor; it’s a dialogue with nature itself.
The rewards are manifold, from breathing new life into tired clumps to creating a flourishing symphony of colors that dance across your garden. As you embark on this journey of division, remember that the guidance and resources available at PlantCouchCenter.com stand as your companions, ready to inspire and support you through each step.
By embracing the enchanting world of daylilies and mastering their division, you’re nurturing plants and fostering a deeper connection to the cycles of growth and the joy of gardening’s ever-evolving canvas.
When should I divide daily?
Spring and early fall are the best times for division.
How do I know if my daylilies need dividing?
Overcrowding, reduced blooms, and stunted growth are signs.
What tools are needed for daily division?
Garden fork, pruning shears, bucket of water, potting mix, and containers.