

When to Divide Hostas?
Welcome to the world of lush foliage and vibrant greenery – the realm of hostas, beloved denizens of countless gardens. These hardy perennials possess an undeniable charm, gracing landscapes with their elegant leaves and adding a touch of nature’s artistry. Yet, like any thriving community, hostas, too, need their space to flourish.
This is where the art of division comes into play – a horticultural dance that ensures their continued health and the perpetuation of their beauty. Imagine orchestrating this verdant ballet, knowing precisely when to make your move, when to lift the curtain on a spectacle of renewal.
In the following guide, we embark on a journey through the seasons, the tools, and the techniques that lead us to the moment when the metaphorical curtain rises. Get ready to learn the secrets of “When to Divide Hostas,” unraveling the enigma of timing and unveiling the rewards of mastering this essential cultivation art.
Signs of Crowding: Knowing When It’s Time
In the dance of nature, even the most graceful performers need their own space to shine. Hostas, with their captivating foliage and distinct personalities, are no exception. As these perennial beauties mature, they create a spectacle of leaves that can stretch wide and unfurl in stunning patterns. Yet, over time, their exuberance can lead to a garden pas de deux: crowding.
The signs of crowding are like subtle whispers from your hostas, conveying their plea for more room to spread their roots and leaves. Watch closely for these hints – leaves that appear smaller than usual, fewer blooms, and a general sense of “tightness” within the clump. If you notice your hostas exhibiting these signals, they yearn for some breathing room.
One of the most telling signs is a decrease in their overall vitality. Crowded hosts often struggle to access nutrients and water, leading to stunted growth and diminished vibrancy. As leaves jostle for sunlight and nutrients, the competition can result in uneven development and a lackluster appearance. Moreover, when the heart of the hosta clump becomes congested, the plant’s ability to produce new shoots and leaves is compromised, resulting in fewer blooms during the flowering season. This is your hosta’s way of expressing its need for a fresh start, a chance to reclaim its radiance.
Intriguingly, the hosta’s signals of crowding echo the human experience of craving personal space and growth. When your once-lush hostas begin showing these signs, they plead for horticultural rejuvenation. The remedy? Division – the art of separating the plant into smaller, more manageable sections.
This practice not only revitalizes the plant but also provides an opportunity for gardeners to multiply their hosta collection, creating more beauty to share. So, as you tend to your garden, listen carefully to the whispers of your hostas and embrace the chance to restore their grace through the act of division.
The Perfect Timing: Seasonal Division Tips
Much like a well-choreographed dance, a successful hosta division requires perfect timing. Hostas are hardy perennials that respond differently to division depending on the season and climate. Timing your division efforts appropriately ensures the best chance for your hostas to recover swiftly and thrive in their new spaces. Let’s unravel the seasonal secrets of when to perform this horticultural ballet.
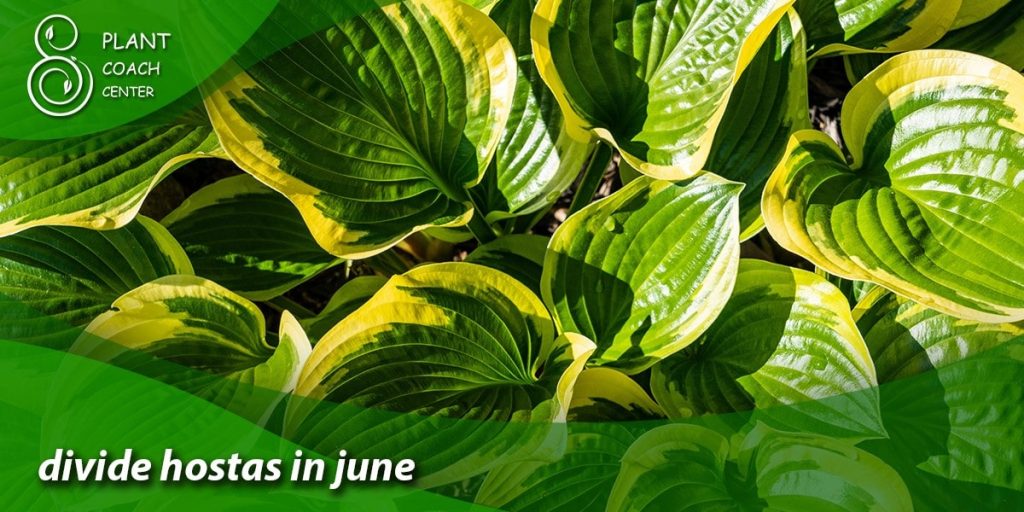
Spring Awakening
Spring is often considered the optimal time for dividing hostas, as it aligns with their natural growth cycle. Aim to undertake division when you see new shoots emerging from the soil. The excellent, moist spring conditions provide the ideal environment for your hostas to establish themselves in their new locations before the heat of summer arrives.
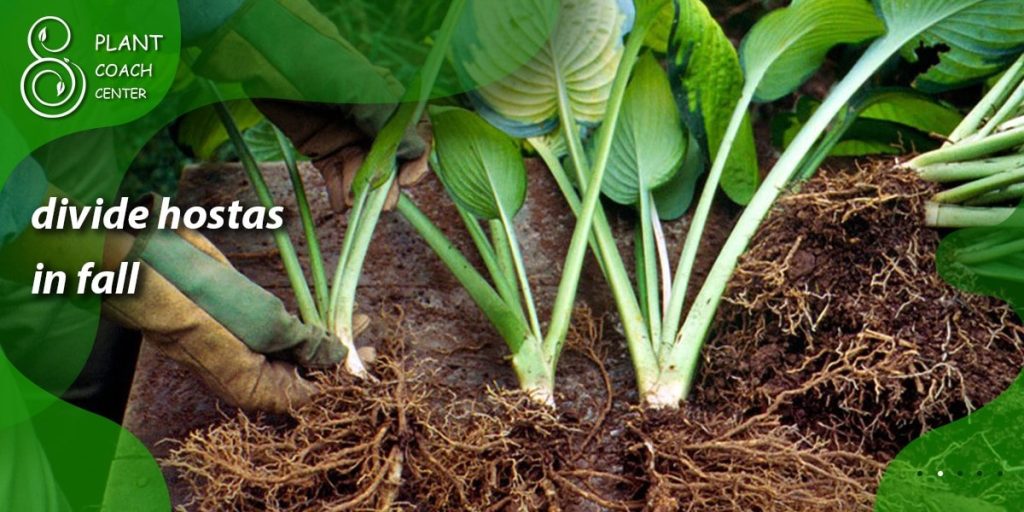
Fall Enchantment
Dividing hostas in the fall can be equally successful, especially in regions with mild autumns. As the temperatures cool, the plants shift their focus from leaf production to root development, making it an opportune moment to split and transplant them. Perform fall division at least six weeks before the first expected frost to ensure the new divisions have time to settle in.
Summer Strategy
While it’s not the preferred time for division, you can still divide hostas during summer, especially if they show extreme crowding or distress. However, you’ll need to take extra precautions to minimize plant stress. Be sure to water thoroughly after division and provide ample shade during the hottest parts of the day.
Winter Whispers
Some gardeners successfully divide hostas during the dormant season in regions with mild winters. The absence of active growth allows the plants to recover with minimal shock. However, be cautious if you choose this option, as the cold temperatures and potential for frost heaving can pose challenges.
Tools of the Trade: Essential Gear for Division
Embarking on the journey of dividing your hostas requires more than just green thumbs – it calls for the right tools to ensure a smooth and successful process. Just as dancers need the perfect footwear, gardeners need a well-equipped arsenal to execute the delicate art of division. Here’s a rundown of the essential gear you’ll want by your side as you prepare to rejuvenate your hostas.
Shovel or Spade
A sturdy shovel or spade is your primary tool for digging up the hosta clump. Choose one with a sharp blade to simplify the process and minimize root damage.
Garden Fork
A garden fork is invaluable for gently loosening the soil around the hosta clump and separating the roots. It’s less likely to damage delicate roots compared to a shovel.
Pruning Shears
Clean and sharp pruning shears are essential for cutting through thick roots and foliage. They’ll help you trim any damaged or dead parts of the plant before division.
Soil Knife
A soil knife, also known as a hori-hori knife, is a versatile tool that can assist in digging, cutting, and separating plant clumps. Its serrated edge makes it useful for authoritarian root systems.
Hand Trowel
A hand trowel is handy for transplanting individual divisions into their new locations. Look for a trowel with a comfortable grip to reduce strain on your hands.
Watering Can or Hose
Proper watering is crucial during and after division. Having a watering can or hose nearby will allow you to keep the divisions hydrated as you work and ensure their successful transition.
Wheelbarrow or Container
A wheelbarrow or container can hold the hosta divisions as you work, making transporting them to their new spots easier and minimizing root exposure.
Gloves and Protective Gear
Protect your hands with suitable gardening gloves to avoid injuries and contact with potential allergens.
Pruners or Scissors
These smaller cutting tools help trim roots and foliage during the division process.
Labels and Marker
Keep track of the different hosta varieties by labeling each division with its name using weather-resistant markers.
Pre-Division Prep: Steps for a Smooth Process
As dancers warm up before their performance, your hostas need pre-division care to ensure a graceful transition. Proper preparation sets the stage for a successful division process, allowing plants to recover swiftly and flourish in their new spaces. Follow these steps to ensure your hostas are ready for their transformation.
Choose the Right Time
Before you start, assess your hostas for signs of crowding, indicating that it’s time for division. Timing is crucial, so plan your division efforts during the appropriate season, considering your region’s climate.
Water Thoroughly
Adequate hydration is essential for minimizing stress during the division process. Water the hostas thoroughly a day or two before you divide them.
Gather Your Tools
Ensure you have all the necessary tools – shovels, pruning shears, gloves, and more – cleaned and ready for action. Having everything at hand will streamline the process.
Prepare New Planting Holes
If you’re transplanting the divisions to new locations, dig the holes where you’ll place them beforehand. This minimizes the time the divisions spend out of the soil.
Trim and Prune
Trim away any dead or damaged foliage, and prune the roots if they are excessively long. This helps reduce stress on the plant and encourages new growth.
Loosen Soil
Gently loosen the soil around the hosta clump using a garden fork. This will make it easier to extract the plant without damaging the roots.
Divide Carefully
Dig up the entire hosta clump, ensuring you get as much of the root system as possible. Use your tools to gently separate the clump into smaller divisions.
Label Divisions
If you’re dividing multiple hosta varieties, label the divisions with weather-resistant markers. This prevents confusion later when transplanting.
Transplant Immediately
If you need to plant the divisions immediately, keep them in a cool, shaded area and avoid letting the roots dry.
Handle with Care
Handle the divisions gently, especially their roots. Rough handling can cause unnecessary stress and hinder their recovery.
Water Again
After transplanting, water the divisions thoroughly. This helps settle the soil around the roots and provides essential hydration.
Dividing Techniques: From Clumps to Crowns
As the curtain rises on the process of hosta division, it’s essential to master the various techniques that transform a crowded clump into individual crowns of beauty. Each division technique requires a delicate touch and careful consideration of the plant’s structure and root system. Let’s explore two primary methods: clump division and crown separation.
Clump Division
This technique divides the entire hosta clump into smaller sections, each with roots and foliage. Here’s how to perform clump division with finesse:
Dig Up the Clump: Using a shovel or garden fork, gently dig up the entire hosta clump, not damaging the roots.
Separate the Clump: With your hands or tools, divide the clump into smaller sections, ensuring each division has an adequate number of healthy roots and shoots.
Trim Roots and Foliage: Trim any damaged or excessively long roots and dead or wilted foliage. This helps the divisions redirect their energy toward new growth.
Plant New Divisions: Transplant each division into its new hole, ensuring the crown (where the roots meet the leaves) is at the same level as the surrounding soil.
Crown Separation
Crown separation involves carefully splitting the clump into individual crowns, each with its roots and leaves. Here’s how to perform this technique with precision:
Expose the Crowns: Gently dig up the hosta clump, then carefully wash away the soil to expose the individual crowns.
Separate the Crowns: Using your hands or a sharp knife, carefully separate the crowns from each other, ensuring each has an intact root system.
Trim and Inspect: Trim any damaged roots and examine the crown for signs of disease or rot. Discard any unhealthy portions.
Transplant the Crowns: Plant each separated crown in its new location, ensuring it is leveled with the soil surface. Water thoroughly after transplanting.
Caring for Divided Hostas: Transplant and Aftercare
The division performance may be complete, but the encore of care and attention for your newly separated hostas is just beginning. Transplanting and aftercare are crucial in ensuring that these resilient plants recover swiftly and continue their dance of growth. Here’s how to nurture your divided hostas for their stunning comeback:
Transplanting with Care
When transplanting your divided hostas, follow these steps to minimize stress and help them settle into their new homes:
Gently Plant: Dig a hole slightly larger than the root system of the division. Place the crown at the same level as the surrounding soil and carefully spread out the roots.
Backfill: Fill the hole with soil, ensuring the division is stable and upright. Gently press the soil down to eliminate air pockets.
Water Thoroughly: Water the newly transplanted division sincerely to help settle the soil around the roots and provide essential hydration.
Post-Transplant Aftercare
Hostas may need some extra care after division to ensure their successful recovery and future growth:
Mulch: Apply a layer of organic mulch around the base of the plant. Mulch helps retain soil moisture, regulate temperature, and suppress weed growth.
Regular Watering: Keep the soil moist during the first few weeks after division. Hostas appreciate consistent moisture as they establish their roots.
Shade Protection: Provide partial shade for a few weeks after transplanting, especially during the hottest parts of the day. This reduces stress and prevents excessive water loss through transpiration.
Fertilize Wisely: After a few weeks, you can apply a balanced, slow-release fertilizer to support the hostas’ growth. Follow the manufacturer’s instructions for application.
Monitor for Issues: Watch for signs of stress, such as wilting or yellowing leaves. Address any issues promptly to ensure the plant’s health.
Limit Flower Removal: While removing flowers to redirect energy toward root development is tempting, allowing a few blooms can help sustain the plant’s overall health.
Patience and Observation
Remember that hosta might take some time to fully recover from division and adjust to their new surroundings. Be patient and observe their progress closely. With time, they’ll reward your efforts with fresh growth and a renewed display of their signature beauty.
Much like a nurturing dance partner, your care and attention guide these divided hostas through their journey to rejuvenation. With proper transplanting and diligent aftercare, you ensure their performance continues to captivate your garden’s stage for years.

Divide and Conquer: Benefits for Plant Health
In the intricate gardening world, division holds more significance than merely creating space; it’s a strategic maneuver that yields many benefits for both the plants and the garden ecosystem. As you divide your hostas, remember the rewards that await your efforts.
Rejuvenated Vigor
Hostas, like any living being, thrive when given room to breathe. Dividing overcrowded clumps rejuvenates their energy by giving them renewed access to nutrients, water, and sunlight. This surge of vitality is reflected in their lush leaves, vibrant colors, and overall health.
Disease Prevention
Crowded plants are more susceptible to diseases and pests due to restricted airflow and increased humidity between leaves. Division creates space that reduces the risk of fungal and bacterial infections, allowing the leaves to dry out faster after rainfall and decreasing the likelihood of disease spread.
Enhanced Aesthetics
A well-planned division transforms your garden into an artful display of balance and symmetry. With each newly divided hosta settled in its own space, its unique attributes shine brighter, creating a visually captivating tapestry that adds charm to your landscape.
Increased Blooming Potential
Crowded hostas may need more resources to produce abundant blooms. After division, each plant can direct its energy toward flower production, producing more prolific and vibrant blossoms during the flowering season.
Garden Expansion
Dividing hostas doesn’t just benefit the plants; it’s an opportunity to multiply your garden’s beauty. You can create new garden beds with multiple divisions or share these treasures with friends and fellow garden enthusiasts.
Sustainable Gardening
By perpetuating hostas through division, you reduce the need to purchase new plants and support sustainable gardening practices. Sharing divisions with others also fosters community and camaraderie among garden lovers.
Long-Term Management
Regular division prevents hostas from outgrowing their designated spaces, reducing the need for frequent and drastic pruning. This proactive approach to plant management saves time and effort in the long run.
Personal Connection
Caring for divided hostas builds a deeper connection with your garden. Witnessing the transformation of these plants over time fosters a sense of accomplishment and nurtures your bond with the natural world.
Conclusion
In gardening, the art of division unveils a transformative spectacle – a choreographed dance between hostas and their caregivers. As you heed the signs of crowding and master the techniques of division, you embark on a journey of rejuvenation, disease prevention, and multiplied beauty. With careful preparation, precise techniques, and nurturing aftercare, you grant your hostas the space they deserve to flourish.
The rewards are evident in their renewed vitality, enhanced aesthetics, and increased blooming potential. By embracing division, you enhance your garden and foster a sustainable and connected gardening community. So, whether you’re a seasoned green thumb or an eager novice, let your garden stage come alive with the grace of divided hostas.
For more tips, guidance, and a thriving community of fellow plant enthusiasts, turn to PlantCouchCenter.com – where the beauty of plants and the joy of nurturing them find their perfect center stage.
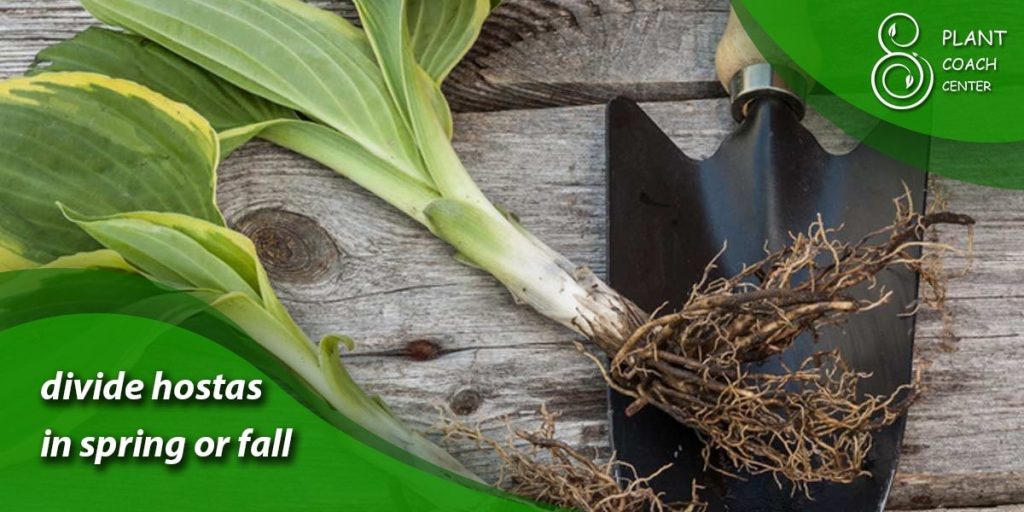
When should I divide my hostas?
Divide in spring or fall for optimal growth and health.
How often should I divide my hostas?
Every 3-4 years to maintain plant vitality and prevent overcrowding.
Can I divide hostas in summer?
Provide shade and ample water to reduce plant stress.